Pages

Showing posts with label back to school. Show all posts
Sunday, July 31, 2016

What does your classroom say about you


What does your classroom decor say about you?

Anyone that is reading this blogpost is most likely either a teacher or a parent. And most teachers are also parents. Everyone can relate to taking your student to their classroom for the first time. One of the first things you notice as a parent may not be the teacher, or the other students but the classroom itself.
What kind of teacher did my son/daughter get this year? Classroom decorations go a long way to communicating what kind of a teacher you are to both parents and youngsters.
So when you are putting together your classroom what do you want it to say about you? Are you strict? Fun? Energetic? Boring? Are you "with it?" (Do you know what is popular with the kids in the age range that you are teaching?
Decorating your classroom with popular cultural icons can go a long way to making that important first connection with your students. And having inspirational posters and posters on behavior is one of the key components to any good classroom management plan.
So all that said, are you ready?
My sister Hilary Lewis has been teaching 2nd grade for over 20 years and this year ended up moving to a new 3rd grade classroom with only 2 years left before retirement! We joined forces over the summer and came up with some classroom decorations in the style of Minecraft called Blockcraft Kids and Pets that will make your life easier and hopefully help make those all important connections.
With the TPT site wide sale and 28% Off everything in our stores, now is the time to find some amazing new decorations and organizational stuff for your classroom! Take a look at some of the decor we created:

Name tags that are individualized can make kids feel special!


Labels that go with the theme brightens up your spaces and helps with organization, not just for you but for anyone that is volunteering or helping in your classroom:


And for classroom management it helps to post character traits that are important to classroom culture, for all kids and parents to see:


And inspiring those kids to learn is one of the biggest parts of our job as teachers. Here are some inspirational posters from my store too!


Good luck with setting up your own amazing classroom this year! Make it the best year ever! So that your students look like this:


And not like this:

I found some great tips from Edudemic on how to help young children feel safe and more at ease in the classroom:
  • Have group activities where children are encouraged to decorate the classroom together.
  • Install a large bulletin board and encourage student to bring photos of their family and pets to pin on the board. Children should also be encouraged to bring and share items of cultural significance to display.
  • Hold an orientation early in the school year where parents are invited to the classroom. This will serve as an icebreaker and help the classroom environment feel less strange."
Have the best year ever!

Sabrina


Tuesday, September 22, 2015

Comprehension for Beginning Readers

Teaching students to comprehend during/after reading doesn't always have to be a quiz or written responses. The idea of comprehension is simply to process what they are reading and understand it. Even the earliest of readers can start to show comprehension skills, even it's just with drawings. The importance of teaching comprehension is so students understand what they just read, and they aren't just reading word without putting meaning behind them. 

Even at the beginning of Kindergarten, we start working on comprehension skills. For my higher academic students, we use this Decode & Draw worksheet bundle which have students read the simple word and then draw a picture to match. My goal is to see if students are able to know what that word means they just read. These worksheets are differentiated with 2 versions: words or simple sentences. 
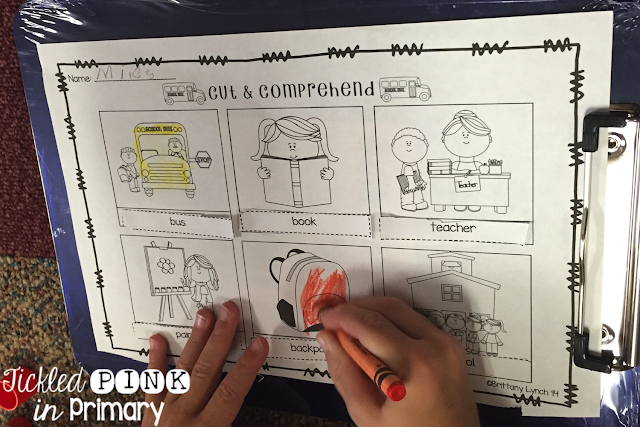
These Cut & Comprehend worksheets are similar and differentiated as well, but students have to cut & paste the words to match the picture.  I told the students that if they couldn't read the word, then they could look at the beginning sound to give them a clue. I made both of these bundles with 2 versions for every month of the year. I can throw these in centers and students will know what to do with this activity all year long! 
Really Good Stuff sells these beach balls that are a fun way to work on comprehension after a read aloud. Throw the ball to a student, have them pick a question and respond to the answer. It's a fun way to engage students, as well as see who was not only listening to your read aloud, but also was processing what you were reading.
Once we start getting our book baskets and attempting to do picture walks and read words, I use these Interactive Reading Responses. Since not all students are on the same level, I can differentiate the pages each students gets and whether they draw or write out their answers. I worked with this student 1 on 1 to discuss the book "Chicka Chicka Boom Boom". He understood the idea of sequencing, but isn't quite ready to write sentences or words yet. I told him he could illustrate what happened in the book and tell me about it when he was finished. Can you tell the letters are falling out of the bent tree...so cute!
The story starter pages in this bundle come with dotted lines and regular lines, depending on what your students need. In the past at my listening center, students would just write and draw about their favorite part. These responses get the students to think more about the book and find ways to connect to what they read. 
 
Here are a few more examples of the interactive pages. Having these fun response sheets available will make your students pay more attention to these skills during their story.
There are over over 20 pages of reading responses to help your students work on comprehending what they read. You can find this bundle in my TPT store here


Monday, August 31, 2015

Snowballs - Start of Year Fun!


Hi, it's Roisin from Little Learner Toolbox! Did I really say snowball fun in fall? Yes! Well, in your classroom at least. One great way to get students on their feet, mingling and meeting new friends, is to have some snowball fun in your classroom. I love snowball fights, or general snowball fun in the classroom. There is something about writing down your thoughts and then throwing your ideas around the classroom (quite literally), that students just love! It is perfect as an icebreaker and a way to get students mingling and sharing ideas at the start of the year (Snowball fights are also a great tool for reflection throughout the year).  

What to do:
The general idea for snowball fun or a snowball fight is pretty simple. You provide your students with  blank pieces of paper and pencils.  Students then write down answers to questions or prompts that you ask them, on pieces of paper. They scrunch up the paper into a small ‘snowball’. When everyone is ready they throw their snowball across the classroom.  Students then reach down and pick up a snowball that had landed near them. They throw that snowball. They repeat this several times, until the snowballs are well and truly mixed up, and your students are laughing and generally having a good time. When you feel your class are ready, ask your students to pick up a snowball near to them and look at it. 

Questions or prompts you could ask at the start of the year include:
1. Write 3 fun facts about yourself
2.. One thing people might not know about you is….
3. One thing you are looking forward to this year is…..
4. One thing that helps you to learn is when……
5. One burning question you would like to ask about this year is…..

One fun thing to do, when you ask students to share fun facts about themselves, or something people might not know about them, is to have students find the author of the snowball, and then introduce them to the class. You may or may not ask your students to write their name on their snowball before they throw it. The snowballs could be signed (making it easy to find them), or the snowballs could be unsigned, and then students have to hunt for the original author before they can introduce them.  

Snowball fun in the classroom can also be used as an opportunity for students to share their questions or thoughts about the  start of the new year anonymously. This can be a nice way to begin establishing a culture where students feel that their opinions and questions are valued. 

Have a wonderful start of the year with your classes! If you are looking for more start of the year activities you might like: 

https://www.teacherspayteachers.com/Product/Back-to-School-Meet-the-Super-Kids-1424305https://www.teacherspayteachers.com/Product/All-About-Me-773594


   https://www.teacherspayteachers.com/Store/Little-Learner-Toolbox


Saturday, August 15, 2015

Mining for Spelling Patterns


Happy Saturday!  I'm Pamela from Hedgehog Reader, and I am here to share a fun way that students can play with letters and words to discover, practice, and reinforce spelling patterns.


Have you ever played Word Mines?  Maybe you've called them something else...  Basically, here is how Word Mines go:

You are given a word (or sometimes a phrase).  To play, you form as many words as possible in the given time using only the letters presented.  (If there is one R, then R can be used only once in that word.  It can be used once again in another word, and so on.)

Call me a nerd (believe me, you won't be the first!), but this has been one of my favorite pastimes for as long as I can remember.  So it was a natural thing for me to develop Word Mines for my students, because I knew it would be a fun way to identify, discover, and play with spelling patterns!

How to Start:

Although it doesn't take long for students to learn Word Mining strategies and procedures, it does require at least one session of whole class instruction to ensure smooth sailing ahead:
  • Students are ready for Word Mines when they have started to develop phonemic awareness, and have begun to identify common spelling patterns.  They should also have some sight words under their belts.
  • Make sure that any word you give students to "mine" is one that holds plenty of words within it.  Not all words are suited to this activity, so my best advice is to try it yourself first.
  • It's fun to use seasonal words or vocabulary pulled from content areas of current study.
  • I find that controversy is avoided by declaring the following rules:  *No proper nouns   *No foreign words   *No contractions
  • I begin by projecting the word to be mined.  (I've created cute seasonal Word Mines so that I could put them under the document camera, but you can also simply write it up on your board.)  Although traditional Word Mines are done with a word or phrase in its original form, I always scramble mine so that students get the bonus activity of solving the "secret word."
  • Depending on the age of your students, it's often helpful to begin with letter tiles, one for each letter in the scrambled word.  This allows students to physically manipulate the letters (concrete reasoning), until they are ready to move into mentally manipulating the letters (abstract reasoning).  This also ensures that letters are only used as many times as they are found within the word.
  • I model my thinking aloud as I "solve" the projected puzzle.  I make sure to demonstrate how patterns can help.  For instance, if I see the pattern ALE, I will play with each consonant and blend to see if it fits with the pattern to create a word.  Then I move from ALE to EAL and repeat the process.
  • Normally after one such session, students are ready to mine for words on their own, with a buddy, or in a team.


Use Word Mines as a Whole Class:

Once students have a grasp of how to work with Word Mines, these make a great Morning Work activity or sponge activity, either individually, in buddies, or as teams:
  • Students stay even more focused if they know they will have 3 minutes for team consultation to tally up total words once the time is up.  It only takes a moment or two to quickly go through how many words each team came up with  (I am not picky, and the students do a wonderful job holding one another accountable for following the rules), and points are awarded for order of most words found.  For instance - If you have 6 teams in your classroom, the team with the most words earns 6 points, and then work your way down to 1 point for the team with the fewest words - so everybody earns something!


Use Word Mines in a Literacy Center:

Word Mines make a great literacy center activity:
  • Glue a puzzle to the front of a file folder or manilla envelope.  Hide an answer key inside.  Provide a set of laminated letter tiles.
  • Students can record their answers on notebook paper or whiteboards, or on prepared worksheets.
  • It’s best to use only one puzzle at a time to prevent confusion; puzzles can be changed out based on your students’ need.  


I've created this FREEBIE for you to try out a Word Mine with your students!  (I have various seasonal and thematic Word Mine resources in my Teachers Pay Teachers store, and I add to my collection often.)

Have a wonderful year with your students, and thanks for reading!


Thursday, August 13, 2015

Five Tips for Co-Teaching Success


Hello!  It's Nicole from Learning Lab again!
Co-Teaching can be one of the most rewarding, yet challenging experiences.  The co-teaching partnership is kind of like a marriage and usually it's an arranged one!  Often, two teachers are partnered up without knowing much about each other.  Administrators dealing with staffing issues may not be able to look at teaching styles and personalities before pairing teachers up.

Here are some tips on how to make your co-teaching relationship a successful one!

It takes time to develop a rapport. Get to know your partner over the summer, if possible. Attend trainings together. Go out for lunch and chat about your family, interests, likes, and dislikes. The trust built over the summer will make the entire year run more smoothly.


Talk about what your expectations are for the year and set boundaries. Do you expect to plan everything together? Do you expect to work before or after school? How will you address grading and report cards? Do you prefer to be contacted at home with a question or would you rather wait until returning to school? Discussing your expectations before the school year starts will make your partnership more cohesive.


Think about the general education teacher as the curriculum specialist. Chances are, they are more familiar with the grade-level curriculum and expectations. The special education teacher is the modifications expert. They will have great ideas of how to modify the classroom environment and assignments to fit the various needs of the classroom. 


Each of you brings great things to the classroom. You each have different experiences and training that has gotten you to this point in your career. You may be used to doing things differently than before you started co-teaching. Just like in a marriage, your co-teaching relationship is a give and take. You will learn a lot and gain a lot if you are open-minded. 


Whether you share one space or you each have your own “home base”, it is important for both of you to truly feel at home in each space. Within the main classroom, you each should have a desk or other personal space. The classroom signs should include each of your names. My classroom signs always include the names of both teachers, all of the teaching assistants,
and all of the related service providers that play an active role in our classroom. It is important for everybody to feel a part of the team. To avoid using the terms “my room” and “your room”, I named my assigned room the “Learning Lab” and refer to the co-teaching classroom as just our “Classroom”. When you split up into groups, it might be a good idea alternate which teacher leaves to use the other space.

Banish the phrases “your kids” and “my kids” and replace it with our kids. Both of you are equally responsible for the students assigned to your classroom. Your students should not feel a sense of belonging to one teacher over the other. When you split into groups or assist 1:1, alternate which teacher works with the different levels of kids. The same goes for working with parents. Communication should come from both of you.


Just like in a marriage, you need to appear to be united. You might not always agree with the other teacher, but it is important to put on a united front and then speak about those differences in private. You always need to back each other up and also support your paraprofessionals as well. Your students will pick up on any disconnect between you and will try to use that to their advantage.


Always speak positively about your partner. You need to work together for at least the entire school year so your relationship needs to be strong. The staff lunch room is not a place to talk about your issues. If you do not have anything nice to say, do not say anything at all. 

A few years ago, a friend of mine was having some trouble within her classroom.  Her team of paraprofessionals were disjointed and often went against each other in front of the students.  She reached out for some advice and it inspired me to create a product geared towards helping classrooms with multiple adults to work together collaboratively in harmony.  I have found it quite useful in my own classroom which has four paraprofessionals.  


Whether you are new to co-teaching, new to your partner, or have been paired up for years, I hope you find this these tips helpful.  

If you want more information about co-teaching, you can find just about everything you need in my Ultimate Co-Teaching Start-Up Kit.  

Thank you for stopping by today!  For more ideas, stop by my blog, Learning Lab, or follow me on Instagram (@Learning_Lab).  Instagram is my favorite way to share quick ideas!

See you again next soon!


Wednesday, August 12, 2015

5 Time-Saving Tips for Teachers

Happy Wednesday! I'm Krista from The Knitted Apple and I'm excited to be back with another blog post on Who's Who!

There is a major change that happens at this time of the year.  The switch from the carefree summer schedule (where I’m not even sure of the day) to the minute-by-minute scheduling that is part of teaching.   Our shiny new teacher calendars and planners are opened for the first time and quickly filled with to-do lists, reminders, and meetings.

It’s always a jolt to return to a such a rigid schedule, and there is never enough time to get everything done.  I manage to squeak out just a little more time in the day by using time-saving strategies. Here are the top five time-savers that I use every day.

1. Use a timer.
I consider a timer to be a time-saver because it helps me use time effectively.  I use a timer regularly during math, reading, and writing workshop.  Before I used a timer my mini lessons would run long and I would lose time needed for meeting with small groups.  I would then have to make up that time the next day, sometimes putting me behind for the rest of the week.  Now  I use a small digital timer to limit my mini lesson time.  When the timer goes off  I wrap up my thoughts and move into working with small groups or individual students.

2. Simplify your conference records.
When conferring with students during writing or reading workshop,  I try to spend more time listening and less time writing.  When I first started conferring with students I took meticulous notes as individual students read aloud or shared writing pieces with me.  Unfortunately I wasn’t the best at giving feedback because I was too busy recording data.  Now I give students my full attention, which results in a more productive conference.  As soon as they get up to leave, I quickly jot down the highlights of the session.  I find that I'm able to meet with more students during the time given and have more useful information which I can use to plan the next conference.

3. Organize your everyday items. 
This is the one I struggle with the most, especially at home.  I am constantly looking for my sunglasses, phone, keys, etc.  At school I am a bit more disciplined.  Near my desk I have wall hooks for those items I need every day, like my classroom keys, badge, and recess whistle.  The few times I have forgotten to place these items in their "home" have resulted in frustration and wasted time.

4. Create a PowerPoint slide for morning work or directions.
One time-saver I am consistent with is the use of single slides for morning work and directions.   I use PowerPoint to create a single slide like the one shown below and display it on the large projector screen. I make it engaging for students by using a school or seasonal theme.  Students are trained from the beginning of the year to check the screen as they enter the classroom.  Mornings are now more focused as students complete their tasks independently.   I am free to greet students, check homework, and submit attendance.  I save this slide on my computer desktop and use it every day, changing the information as needed.


5.  Use newsletter templates.  I mentioned in tip #4 that I create a single PowerPoint slide for morning work and quickly change it every day as needed.  I also use templates for weekly newsletters, which communicate curriculum and other important news to parents.  Once the template is created I can quickly change the information each week.  The newsletter shown below is part of my Superhero Newsletter Templates.  


Hopefully these time-savers will be useful to you.  I’d love to hear your time-saving tips.  Please post your tips in the comments! 

If you are interested in viewing the Superhero PowerPoint and Newsletter Templates as shown in the pictures, just click the images above.  I also have many free newsletter templates for you to try! Click here to check out the free newsletter templates in my TpT store

Happy Time-Saving! 


Saturday, July 25, 2015

Guiding Beginning Readers

Hi there, 
It's Jackie & Kylene from JK Curriculum Connection!
********************************************************************* 
Learning to read might seem easy but there are a LOT of skills and concepts that must be experienced for young children to be "on their way" as readers.

First, there are several concepts that beginning readers either pick up from experiences with books when they are very young or the skills must be explicitly taught if children did not have those book experiences.


Dr. Marie Clay was a pioneer in studying the behaviors of beginning and struggling readers. Through her studies in New Zealand, she developed the "Reading Recovery" intervention program.  She called the Concepts of Print "the rules of the road" and writes, "Teachers must teach so all children become knowledgeable about these essential concepts so they open doors to literacy."


The Concepts of Print include:

*Book orientation (front, back, where the story begins, page turning, etc.)
*Left to right directionality
*Return sweep (at the end of each line of print the reader returns to the left again)
*Text Knowledge: knowing that the text contains the story while the pictures 
support that text
*Understanding certain reading terms:  letter, word, sentence, top/bottom of a page, 
*Simple punctuation marks.
*One-to-one word matching

Here is a Literacy Center idea where children sort letter cards, word cards, and picture cards.  This "concept of print" activity can easily be made using index cards and media cut from magazines.  Different fonts and letter sizes may be used.  The letters, words and pictures aren't related across the board.  The students are merely looking at each item and deciding what category they fit under.  

Here is another Literacy Center activity which helps children focus on the concept of a word and word length. Use large pieces (9" x 12") of construction paper as the mats.  Write 2-letter, 3-letter, 4-letter and 5-letter words on 3x5 cards. (8 cards will fit on each mat.)  Students shuffle the cards and sort them  onto the correct mats. These are most likely not words they can read since they are really just attending to the length of the words. You can differentiate for ability levels by limiting the number of mats and cards a child uses at one time or challenge higher level students by making mats with words that are 7 or 8 letters! (It's also a sneaky way to get some counting practice in!!)

Supportive Reading Materials
With the right reading materials students can begin to read Early Emergent readers.  
Early Emergent Readers should have the following features:
*Strong picture support
*Controlled text
*Repetitive patterns
*Natural language
*Large print
*Familiar concepts
*Limited text on a page

*Wider spacing between the words


Here is a video of a 5-year old who has not been to school yet (but has been read to a LOT!) She is reading a supportive emergent reader.  Notice how she finger matches on each word. The text has small dots below each word to help with this skill. 

Beginning reading materials may consist of simple word phrases such as seen in the book above.  Other books have simple patterned sentences.  There should be strong picture support and repetitive patterns where only 1 or 2 words change from page to page. 


Here is an example of a beginning reader using a repetitive sentence pattern with a small change on the last page to provide just a little challenge!  Click {HERE} to download this FREEBIE. 


Reading Strategies

As children are developing their reading skills, they can be "coached" regarding the reading strategies they are using and should be using.  
Some of these strategies include:
1) Look at the picture
2) Get your mouth ready to make the first sound
3) Look for small "chunks" (letter pairs or word parts they recognize in a word)
4) Try a word that makes sense
5) Go back and read it again.
6) Ask "Does it sound right?"  "Does it all match?"  "Does it make sense?"

Here's a chart and cards with key visuals that we have found useful to use in the classroom.  There is also a black & white version to send home. Click {HERE} to download this file. 


Learning High Frequency Words
It is important for students to memorize/learn by sight a bank of high frequency words. These are words that occur most frequently in written material.  Words like the, are, as, and of are some examples. These often are words that may have no specific visual image connected to them but are needed to create the flow of natural language.

There are 2 types of high frequency/sight words.  Some can be sounded out phonetically like can or it.  Since these words are highly used, they should become recognizable on sight rather than be decoded  The more words students know on sight, they more fluent they will become. Fluency aids in reading comprehension. Other words are NOT phonetic and can only be learned by sight,  Sometimes these words are called Tricky or Challenge Words (ex.the, said, have, and here). These words are not sounded out and must be learned through repeated exposure and practice. 


Sight words should be practiced until they are recognized immediately when seen. Here is a song we wrote to engage students in learning sight words. Also included is a Sight Word Bingo game with EDITABLE cards!  Click the link {HERE} to get this FREEBIE!


We hope you find these activities helpful when you start teaching your new class of beginning readers!


Graphics provided by Classroom Doodle Diva, Whimsey Workshop Teaching, and Educlips.