Showing posts with label Science. Show all posts
Friday, September 15, 2017
How to Incorporate ELA Skills in the K-1st Science Classroom
If you teach K-2nd, you know that you have a certain amount of minutes dedicated to each subject. Yet the increasing rigor in the standards require kinder teachers to have their class reading by the end of the year. So, we find ways to incorporate ELA skills into content areas while still teaching content area standards. How can we do this successfully?
1. Find grade level text that talks about what you're teaching. Some good resources are reading a to z. While most of their readers don't directly meet the standards, I have had luck finding books there that can be used for certain lessons. This, this, and this science predictable readers meet the Texas kinder TEKS. They include a predictable reader and a video that reads the book aloud to be used for a shared reading. These will soon be a part of a bundle.
Whichever resource you choose, you can have it available after your unit is complete. It can be put in your science center, or in children's book boxes, depending on what their independent reading level is.
2. Follow a 5E lesson plan. (Engage, explore, explain, elaborate, evaluate). If you follow this format for math and science, you will more than likely have to find text to go with the "explain" portion of your lesson. Sometimes you'll be able to fit it in to the "elaborate" portion as well! In the "explain" or"elaborate" portion of your lesson you can also incorporate a written response, which brings me to my next point...
3. Incorporate a written response or reflection at some point in your lesson. If you're doing a science experiment that day, you could have them write their prediction right before you've told them the experiment and they're excited about it. If you've just explored hands on materials for a lesson you're teaching, take the time to have them reflect. First they tell their impressions to a buddy (as a pre-writing activity). Then have them go to their seat and quietly reflect in their science notebook about their findings.
This blog post was written by Teacherof20, TpT seller, blogger, and SAHM to two great kids!
Tuesday, December 29, 2015
Weather + Data Tracking = Engaged Students!
This is Krista from The Knitted Apple
and I am happy to be back with another blog post on Who’s Who!
We are experiencing quite interesting
weather in North Texas today. It has
been raining nonstop for hours and last night there were several tornadoes in
the area. I’m one of those weather geeks
who loves checking weather apps to see what the weather is like in different
parts of the country. Right now in North Texas
the temperature is a wet and rainy 46 degrees but in my hometown of Lincoln,
Nebraska it is a frigid 14 degrees with a “real feel” of 4 below. YIKES!
One science unit I teach every year is weather,
which is taught in several
grade levels with varying
expectations
for
each grade. Third graders in Texas are
expected to track the weather occurring in different locations at the same
time. When I completed this unit for the first time, I was happily surprised at how engaged and
excited students were. We looked at
weather in different locations in the United States and tracked the
temperature, chance of precipitation, and wind speed for each. To make it more exciting our data tracking just happened
to include a week of intense weather across the U.S.
Students noted heavy snowfall, below freezing temps, winter storm
warnings, and wind and flood advisories.
In other cities temperatures were mild and uneventful. Students recorded data on a tracking sheet
for five days, recording the weather from four cities at the same time. Once I showed them where to find the weather
data and we completed an example together, this tracking part ran itself. Immediately when Science began students would
partner up, grab a laptop or device, and go to one of the weather sites to
record data. They could not contain
their excitement as they saw the changes that occurred from one day to the
next.
Here are two student-friendly
websites I use for tracking weather data:
Choose 3-4 cities to use for
tracking weather, and be consistent in recording data at approximately the
same time every day. As students collect weather data there will be
opportunities for meaningful discussions about these differences in weather from one city to the next.This is a perfect opportunity time
to pull down that dusty map in your classroom and incorporate geography.
You can track weather at national
parks or landmarks for an interesting twist! Try tracking weather data for Yosemite National Park in California and Big
Bend National Park in Texas! Show these places to students on a map and have
them discuss why there could be such an extreme difference in weather
conditions.
If you are interested in a complete
weather unit you can use in your classroom, you can click on the image shown
below. This resource is in my TeachersPay Teachers store and includes a creative writing component in addition to weather
tracking.
I hope your students enjoy learning
about weather!
Thursday, November 19, 2015
Science with Catapults
Hi, It's Anita Goodwin here from I Live 2 Learn I Love 2 Grow with a super fun activity to share. I've always loved "Hands On Science" and so do my students. While recently studying force in our classroom I came across a neat blog post by Frugal For Boys using popsicle stick catapults and thought it would be fun to explore catapults in the classroom. I decided to use some "fallish" things to shoot in them. I happened to have 2 bags of those plastic spiders in my closet and knew they would work and it would be interesting to compare them with candy corn to see which we could shoot the furthest. I loved the suggestion in the post to use the bands from the loom bracelets and made a quick trip to Walmart to buy some sticks and bands. It cost around $6.00 and was money well spent.
(Note: Catapults can be used immediately after hot glueing. If using tacky or Elmer's squeeze glue let dry overnight. We did have some trouble with a few lids coming off the sticks. If I had time I just quickly reglued them otherwise I just had them shoot their objects without them.)
We had lots of fun shooting the candy corn and spiders and comparing them. We even had a class competition. The two furthest shooters competed against each other while the class watched and recorded. The next day we used used Snapple lids and milk jug lids. The blank sheets included in my catapult set can be used to record any objects you have.
Click here to get your FREEBIE recording sheet.
You can also check out my set on TPT which includes many more recording sheets.
Monday, May 25, 2015
Creative Writing + Science = Meaningful Learning!
Happy Monday! I'm Krista from The Knitted Apple and I'm thrilled to be back with another blog post on Who's Who!
What makes these subjects a perfect match when used as an assessment? One simple reason- science and writing projects are much more engaging for students than a traditional test! They get EXCITED each time a new project is introduced. Students collaborate with others, apply knowledge learned, and show creativity!
To plan an integrated science and writing project, think about the concept you are assessing. For example, when studying forms of energy I wanted to students to be able to identify the forms of energy and how each is used. I also wanted them to apply their knowledge of specific forms of energy to create something original. In this case, it was a robot! I developed a rubric, making sure this information was included. I then added expectations for the writing piece, including points for correct sentence structure, capitalization, and punctuation.
When you are ready to introduce the project to your class, I recommend the following tips:
Today I want to share an idea for integrating two subjects students love- Science and Creative Writing! At first, it may seem the two are not the best match, but I've found they are a perfect fit when used to assess understanding of a science concept students have studied.
What makes these subjects a perfect match when used as an assessment? One simple reason- science and writing projects are much more engaging for students than a traditional test! They get EXCITED each time a new project is introduced. Students collaborate with others, apply knowledge learned, and show creativity!
To plan an integrated science and writing project, think about the concept you are assessing. For example, when studying forms of energy I wanted to students to be able to identify the forms of energy and how each is used. I also wanted them to apply their knowledge of specific forms of energy to create something original. In this case, it was a robot! I developed a rubric, making sure this information was included. I then added expectations for the writing piece, including points for correct sentence structure, capitalization, and punctuation.
When you are ready to introduce the project to your class, I recommend the following tips:
- Review the concept being assessed by revisiting anchor charts or discussing the main points.
- Show excitement when introducing the project. Students will build on your enthusiasm!
- Explain the expectations for the project. I recommend using a rubric and displaying it while students are working.
- Make sure you have allotted time in your schedule. Most of my projects take at least two class periods to complete, as they include both a planning page (rough draft) and project page (final draft).
- Group students together in pairs or small groups to edit and revise after completing the rough draft.
- After revising, allow an extended time for students to complete the final project page. Provide colored pencils, markers, and crayons to make the designs come to life!
The most important tip of all- make sure students have an opportunity to share their designs and writing. Other students will learn by hearing how the presenter applied the concept studied. You will be amazed at the creativity of the students. Just provide the expectations and framework for the project, and let them do the rest!
One of my favorite science and writing projects is available free from my TpT store! If your students have studied Forms of Energy this year my Robot Project would be a great review. To grab a copy, just click the image below!
Monday, April 6, 2015
Simple Science
Hi Everyone! I'm Kristen and I'm excited to be sharing some simple science ideas with you today! I am a BIG fan of Science in the early childhood classroom (K-2). In this day and age, Science is often the first thing to get booted out of our busy schedules, but I find it so easy to incorporate and it fits in with so many subject areas! I recently presented a session at the National Science Teachers Association (NSTA) conference in Chicago and thought I would share a few ideas with you!
I love to start out my Science units with a great piece of literature; but if you don't have a copy of these, substitute your own!
This idea is all about camouflage! I like to read this book first:
Then I pass out squares of fabric (I got these at Jo-Ann's and they are precut fat quarters for quilting--so no cutting necessary!) and a variety of plastic bugs/amphibians purchased from the Dollar Tree. The children work with the plastic critters to find the best camouflage for each one! As an extension, the children get a critter cut out (fish, butterflies, etc.) and try to camouflage it in the classroom.
My students are always amazed that on a days when we have a rainy morning, the puddles are gone by our sunny afternoon recess. They love learning about the water cycle and how a drop of water travels.
I start out with a book about the water cycle:
Then, we do this activity. I have pony beads in several different colors and location cards that show the different places a drop of water can travel (dirt, plants, animals, pond, lake, cloud, etc.). The children roll the die; pretending they are a drop of water, to determine where their droplet will travel. Each time they visit a station, they place one of the pony beads on a pipe cleaner to form a water droplet travel bracelet. They keep rolling the die until you tell them to stop.
This last idea, is one of my favorite! My Kinders and I do a big study each year about the Monarch Butterfly. I read any one of my favorite Monarch life cycle books and then we make these life cycle bracelets. I place the pony beads in plastic containers so the children can walk down both sides of the containers as they make their bracelets. I label each container with what part of the life cycle it contains and how many of that bead the child needs to take and add to their pipe cleaner.
I get all my pony beads at Michael's or Jo-Ann's and use my 40% of coupon, wait until they are on sale, or use my teacher discount card. I also always buy the largest bag possible because I won't have to buy that color again for a long time! :)
You can get the handouts from my session here. They contain all the directions for the two bracelets as well as some songs and other ideas for teaching Simple Science in your classroom!
I hope you'll try some of these ideas in your classroom! Follow my blog for more Simple Science ideas!
Wednesday, February 4, 2015
Human Body Systems Made Easy!
Have you ever had to teach students about the different human body systems? It is no easy task because there is just so much vocabulary and new concepts to learn with each system. Hi, it is Jane here checking in again with a few tips that have worked for me when teaching this unit as part of my science program.
1. Videos, Videos, Videos
When teaching the different systems I think it is very important to involve every sense you can. I don't know about you but I am a very visual learner so watching a short video always helps me to better understand a topic. I have been lucky to have access to BrainPop and BrainPop Jr at my schools. I also really like the videos found on the KidsHealth website. I find showing a video can be a great way to introduce a body system or you can also show one at the end to consolidate student's learning.
![]() |
| KidsHealth Website |
![]() |
| BrainPop Website |
2. Experiments, Experiments, Experiments
I try to provide a hands on experiment for each body system that I teach. Sometimes when I am in the middle of an experiment with twenty five students, I begin to say to myself "What was I thinking?". Then I will hear a student say "This is the most fun I ever had in science!" and I will know all the prep time that went into preparing the lesson and a somewhat chaotic science class was well worth it.
My favourite experiment when teaching about the circulatory system is how to make blood. I know it may sound a bit gross but the students love putting it altogether. Teacher tip: Take it from me, do not leave it in your class for too many days and do not open the top! It may look cool but it doesn't smell too nice.
| Model of Blood |
My favourite experiment when teaching about the respiratory system is to make a model lung. I make the model using only one balloon but students still get the idea about how we breathe. My students love making these and are always so excited to bring them home to show their parents how the the diaphragm works.
![]() |
| Model Lungs |
Teaching about the digestive system just wouldn't seem complete without having students squeeze some crackers and water together in a Ziploc bag to demonstrate how the stomach muscles in our stomach work. The students find it disgusting but they love it just the same.
3. Note takers, Note takers, Note takers
After all the videos, experiments, and reading about the various systems I had to come up with some way to help my students organize their learning. Thus the human body system note takers were born! I work with my students to help them complete the various organizers on each system. Below are some images from the Circulatory Note taker to give you an idea of how they work.

You can have a look at the various science note takers at my TPT store by clicking here. They have certainly helped my students by keeping them organized and learning about science in an engaging and fun way.
Wednesday, September 3, 2014
Apple Tasting
Hey everyone! I'm so excited to share with you that I now have my own blog called Tickled Pink in Primary! I took the plunge into the blogging world and am loving getting to share my ideas with you. I'd love for you to check it out and follow my page!
Can you believe it's September already? September is always a fun month in Kindergarten because we get to learn all about apples! I know many teachers are moving away from themes. However, I think you can still do your old themed activities AND incorporate your common core standards. Having a theme can also tie in all of your academics throughout the day. This post will just be a small portion of what we do when we learn about apples.
We were working on sorting during math, which naturally leads to learning how to graph what you sorted. I brought in red, yellow, and green apples. First we sorted the apples by color, then by size. We also discussed how they were similar and different. Students predicted what each apple would taste like. Then, I cut up the apples and let students have a few minutes to taste them all.
They were SO happy to get a snack and compare with their friends how they tasted and which one was their favorite! We are also working on descriptive words in class. I asked them to give me some ways to describe what the apple tastes like, and they couldn't say "good". Here are some of the words I got: yummy, slimy, awesome, tasty, mushy, crunchy, delicious...
After the apple tasting, I handed out this graphing worksheet. We went around the room and asked each kid what kind of apple they liked the best. I always have to remind them to say how they really feel and not just what their friend picked. :) After each student answered, we colored in our graph to match their answer. As you can see we had to make an extra box since 11 kids liked the yellow apples.
After graphing our results, we then answered a few questions about the graph. I noticed many students looking at my color posters to see how to spell the colors words. Very resourceful!! As you can see while doing this simple apple tasting activity, we were able to fit in many math and writing skills.
The worksheets above are included in my Apple Literacy & Math Activities bundle which includes 12 activities that work on reading, writing, math, and science. It's a great way to incorporate common core while still having fun!
Do you still use themes in your classroom or just units of study?
Monday, March 17, 2014
Windy Weather
This week my kindergarten class will be learning about windy weather! I have created a Windy Weather Center freebie for teachers to use with their weather themes. I have also listed several books that are great to read to your class about Windy Weather.
This center also corresponds with the new Next Generation Science Standards (NGSS). The NGSS that correspond with this lesson for kindergarten: K-ESS2-1 -Earth Systems and K-PS2-1 Motion and Stability.
Will the Wind Blow? Center
![]() |
| Children will sort items by whether or not they will blow in the wind. |
![]() |
| A photo of the back of the center label card with instructions |
![]() |
| Worksheet to reinforce windy weather skills. |
You can download this file for free from my TpT store: Windy Weather Center
Windy Weather Books
Here are some books that I will be reading with my class this week that revolve around the wind.
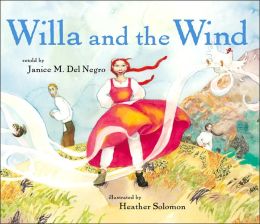
Willa and the Wind by Janice M. Del Negro follows a girl named Willa who is a strong, courages, and bold girl. Willa confronts the North Wind to ask for her cornmeal back. The wind gives the cornmeal back but the innkeeper steals the cornmeal. Willa believes that the wind is playing a trick on her.
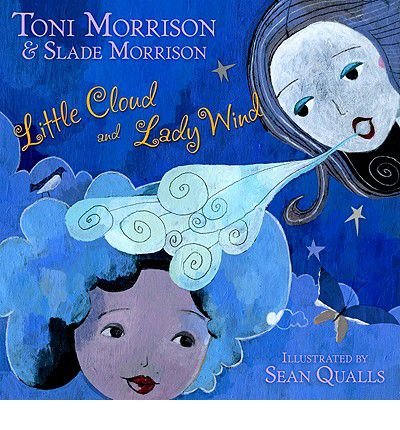
Little Cloud and Lady Wind by Toni Morrison and Slade Morrison is another favorite of my students. Little Cloud decides not to stay with the other clouds. Little Cloud "Not wanting to blend into a group and loose her freedom, not wanting to frighten the earth, she found a quiet place in the sky."
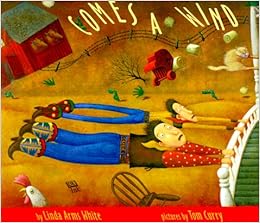
Comes A Wind by Linda Arms White is a huge crowd pleaser with my students. It is a funny story of siblings who try to one-up each other. They promise their mother on her birthday to get a long and keep peace; however, they revert back to their rival by one-upping each other. While this is happening they do not recognize that a big wind has come and is carrying everything away (including their mother!) The boys stop their squabbling long enough to save their mother.
Bag in the Wind by Ted Kooser is a fantastic book. Ted Kooser's book follows a bag that has been swept away from a garbage truck by the wind as it passes by people in a small town. Some recognize the bag while others are oblivious to the garbage floating in the air. This book is a great book to read to your students about waste, landfills, and ways we can re-use items with keeping with a wind theme.
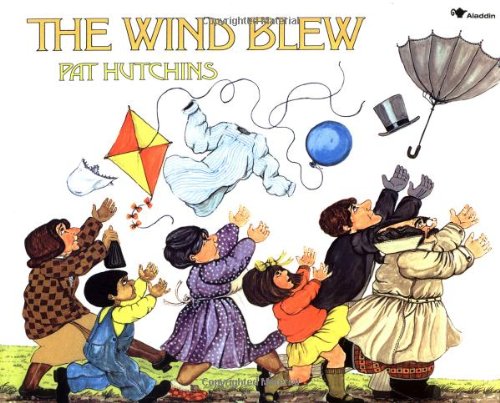
The Winder Blew by Pat Hutchins is a classic story that I read with my students every year. A big wind comes to a small town and blows items from the people. They try to catch their items but the wind is being tricky. This story is a great story to read before implementing the centers from above.
Windy Videos
I could not talk about windy weather and science without talking about Billy Nye! Bill Nye has a serious of DVDs that are produced by Disney on many science topics. These DVDs are full of entertaining skits that help students learn about particular science skills. This week we will be watching portions of Billy Nye the Science Guy's DVD on Wind.
A clip from Billy Nye the Science Guys' DVD on Wind.
Subscribe to:
Posts (Atom)