Pages

Showing posts with label Art. Show all posts
Saturday, April 22, 2017

End of Year Emoji Day


As the end of the school year approaches, I am always looking for ways to keep my students engaged and learning right until the last day.  This year I decided to create some activities featuring emojis to do just that.  I was inspired by the idea after Scholastic sent me some emoji themed bookmarks with my last book order.  The students loved them and were so excited because they contained those little smiley faces.  So I decided to host an "Emoji Day" to hopefully capture some of their excitement and help with the countdown to summer break.  Who knows, I may even stretch it out over two days!

To build some excitement about the upcoming emoji day, you can ask your students to dress all in yellow and black.  Then decorate your class door to greet them as they arrive in the morning.  During morning meeting show them some of the activities they will be completing during the day.  I also bought some emoji themed props to help set the stage for the day.  I found a kissing emoji at my local dollar store and I was lucky to grab these emoji themed buckets in the 50% off section of Walmart.  They will be great for holding the materials for each center.

I find this time of year it is important to change things up and try adding something different from the usual routine.  I am going to have students collect different emoji collector cards as they finish each activity.  This will work great as a motivator for students to finish their work.  These collector cards can then be kept in the student's wallet to take home at the end of the day.  I may add string to each wallet and students would be able to wear them as a necklace during the day.  I think it is important to let students be creative.  Give them a blank t-shirt or iPhone sheet and let them create what they thing the next emoji should be.


I think it is important to also keep practising math, reading and writing skills right up to the end of the school year.  My students slide back over the summer and I want to make sure I am doing my best to slow down this process.  Having students roll an emoji dice to practise graphing skills and reading all about emojis is a great way to keep students learning.  Did you know that there are 69 new emojis coming soon?  Did you know that there will be a curling stone, T-REX, and gloves?  I had no idea before doing a bit of research.  I also want my students writing everyday and adding some emojis just seems to make reluctant writers want to pick up their pencil and get started.

Finally, this time of year is all about making memories.  Students can make an emoji booklet which highlights some of their favorite things on one side and then collecting the autographs of their classmates on the other side.  What a great keepsake to look back on in the future.  If hosting an "Emoji Day" sounds like something you would like to try, you can find these activities here


Sunday, March 20, 2016

Celebrating the Arts!

Hi!  I'm Hannah from 21st Century K and I'm excited to share how my school works to celebrate the arts.  In response to new program reviews and standards a few years ago, we began holding an Arts Showcase for our primary students each spring.  


After reviewing the standards we found that while we provided more than adequate opportunities for experiences with visual art, music, dance, and drama in a learning/classroom-type environment we failed to offer our students the opportunity to create, collaborate, perform, critique and explore the arts in their own unique ways.  
So, we encouraged students (and their families) to choose anything creative for which they felt they had special talent or aptitude, and plan a way to present that talent to their classmates.  Then each class held individual performances and voted on which talent/presentation/performance they would like to represent their class in a school wide Create Arts Day Showcase.  No emphasis is placed on winning and losing or who is better/worse.  Our showcase isn't a talent show and very few parents attend. It is simply a way for students to share a way in which they are creative.

What resulted was more than any of our teachers could have ever imagined...

Our young students, as an audience, were respectful, encouraging, and thoughtful. Within each classroom a special story unfolded.   In a second grade classroom an athletic boy puts together a basketball dribbling routine and sets it to music for which the crowd cheers. In one third grade classroom a friend with special needs sings a Michael Jackson song and is unanimously voted into the show where she receives a standing ovation. In another class, a quiet boy shares his amazing computerized robot for which he wrote the programming and is voted into the show over the Broadway show-tune belted out by the girl who regularly participates in local theater performances. In my Kindergarten classroom a typically outgoing and boisterous girl quietly shares a memoir she wrote about her lost pet goldfish and she is hugged by her friends, many of whom are brought to tears.  My own daughter, when she was in second grade, was begged by her class to sing "Let It Go" for the school showcase, encouraging her to overcome stage fright and perform for an audience for the first time in her life. I watched her blossom before my very eyes and was touched to see her classmates give her encouraging looks and a loud, supportive ovation as she finished the song. Many more students played instruments, performed dance routines, and paraded visual arts pieces across the gym.  Each time the crowd of primary students would cheer and clap as if they were at a Grammy-nominated performance.

We all learn a lot of valuable lessons during this week of the school year.

  • As teachers we are reminded that the "extra" stuff (about which we may grumble when it interrupts our comfortable school day routine) is worthy of our time.
  • As regular educators we are reminded that the arts programs are vital to our school and our students (and that the art, drama, music, and PE teachers have a hard job).
  • We learn to view many of our students in a new light... many of which are little diamonds in the rough or have secret talents about which we didn't know.
  • From our students we learn that a little bit of grace and humility can go a long way and that supporting each other by cheering wildly when someone else succeeds is just what friends should do.
  • Interested in starting your own Creative Arts Day?

We send parents a note one week prior saying all students are welcome to participate by preparing any creative presentation including, but certainly not limited to, any visual arts pieces, vocal/instrumental performances, creative writing, dance or other movement routine, anything involving creativity with technology, and dramatic performances or collaborations. Each teacher provides a little class time to discuss projects and ideas, and provides time for friends who may not ave time at home to prepare.  Each class plans a day for class performances and works together to choose one student to perform at the school wide assembly.  Administrators and arts teachers work together to make sure students have all they need and to set a schedule for the school showcase. Then on a Friday afternoon we all gather in the gym to simply celebrate creativity and the arts.

It's simple... after all, the best things in life always are.
Add the Arts to your Common Core instruction in grades K, 1st, and 2nd with this fun unit, "Talents," at 21st Century K on TpT.


Friday, February 12, 2016

Winter Art That Teaches Color Value

Winter is not over yet so I got to teach my students the values of color with my FAVORITE art lesson!!!!

http://terristeachingtreasures.blogspot.ca/2013/01/winter-wonderland-art.html

This art project teachers students patience because it is done in 3 stages with paint drying in between. I find that the waiting for each part helps build the anticipation of my little eager students!

http://terristeachingtreasures.blogspot.ca/2013/01/winter-wonderland-art.htmlhttp://terristeachingtreasures.blogspot.ca/2013/01/winter-wonderland-art.html
All that is needed to complete this is a white piece of paper (I used card stock) and 3 colors of paint (blue, white, and black)! 

You can get easy, step-by-step instructions on how we completed this beautiful, eye-catching art work here.

http://terristeachingtreasures.blogspot.ca/2013/01/winter-wonderland-art.htmlCheers,


Sunday, August 23, 2015

Why I used to hate the first day of school...

Why I hate the first day of school and how I learned to enjoy it.


Personally I used to hate the first day of school. Other teachers loved it, I hated it. It was awkward, I didn't know my students, they didn't know me...it was just icky. When I first started teaching I would go through my rules and procedures and watch as my students would fall asleep, get intimidated, or just look miserable. What they didn't know is that I was even more miserable. Ick. 

I had to figure out a way to make it more enjoyable. I was tired of being in tears, literally, at the end of every first day. So I decided to bag the rules and procedures. We could go through that stuff later. I wanted to have fun. I wanted my students to have fun and I wanted to set a creative atmosphere in my room without losing control.

Here are some activities that saved me from hating that first day.

5 Circles and 10 Lines Activity:

I hand out 10" x 10" squares of drawing paper, and show this powerpoint presentation to the students.

I tell them to turn their paper over and I say: 
"We are going to start this class with a creative exercise, because that is what art is all about. Creativity. This should be fun, so try not to stress too much about it, but carefully consider your options and try to come up with a fun or interesting solution to the following prompt. "


Stop there and let the students ask questions.
(I love to see which students will ask questions
and which will just dive in.)


I choose some designs that show examples of the
Elements of Art and show them under the
document camera. We discuss them as a class.
What makes them interesting?

Here is an example of one of my students designs.


This presentation is free on my store, 

Finish the Drawing Worksheets
I pass out these fun worksheets and get my
students doodling right out of the gate. I found
these by a new seller called iworksheets It looks
like they have a ton of fun stuff to choose from!


What is this frog going to catch?
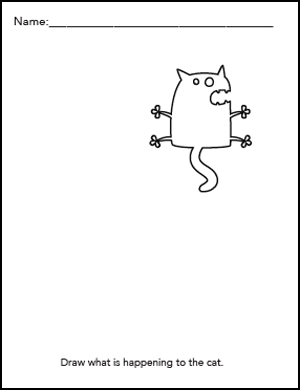
 Draw what is happening to the cat


It looks like that same seller has some bigger workbooks that can be used throughout the year. Very cool printables and creativity boosters!


Doodle Activity

Think outside the line!
Your assignment is to draw a doodle incorporating the pre-existing line into your doodle. There is no right or wrong, good or bad, just have fun and allow yourself to be creative. Don’t look for the easy way out, make your brain explore all the possibilities! Any orientation whether vertical, horizontal, upside down or sideways is acceptable!


Here is that lesson if you want to grab it.


 Drawing Doodles


Truly these lessons helped me to turn the first day of school from a chore, to an enjoyable experience for both me and my students. I hope you find something that works well for you and your students. Have a wonderful year!


Sabrina Wingren
A Space to Create


Sunday, April 19, 2015

Reusing for Earth Day

Earth Day is coming up this week so I thought I would share with you one way we reuse in my classroom. I just used these in my classroom on Friday when we were doing art so it is fresh in my mind.

I am not sure exactly when I had this idea but I know that it has made painting in my classroom a whole lot easier and clutter free. Being a teacher I like to "collect" many old things. Yup you know the saying "a teacher can find use out of someone else's garbage." Well that is exactly what I do.

Many of my students bring in lunchables for lunch time and there is SOOOO much garbage. One day I thought there has to be a use for them. Well there is !!! I have my students save them and we use them as paint containers. Genius I know :) Of course the paper outer wrap goes in the recycling.


Instead of students carefully putting multiple containers of paint on their desk or table and hoping it doesn't get knocked over all they have is ONE container with multiple paint colors in it. Yay! Less mess. These containers usually come with 3 or 4 compartments in them. 
The plastic containers are super easy to clean and stack nicely in the cupboard. I have used both tempera and acrylic paints in the containers and they both wash out easily. I love finding useful tools and even better that this one can be recycled and avoid the landfills for a little longer !

http://terristeachingtreasures.blogspot.ca/I hope this tip helps keep your art time a little less cluttered and your garbage cans emptier.


Cheers,


Friday, January 23, 2015

Creating meaning: An Artful Approach to Teaching


Creating meaning: An Artful Approach to Teaching

Using art as a vehicle to bring meaning to assignments can improve student engagement and create a classroom culture that is vibrant and exciting.

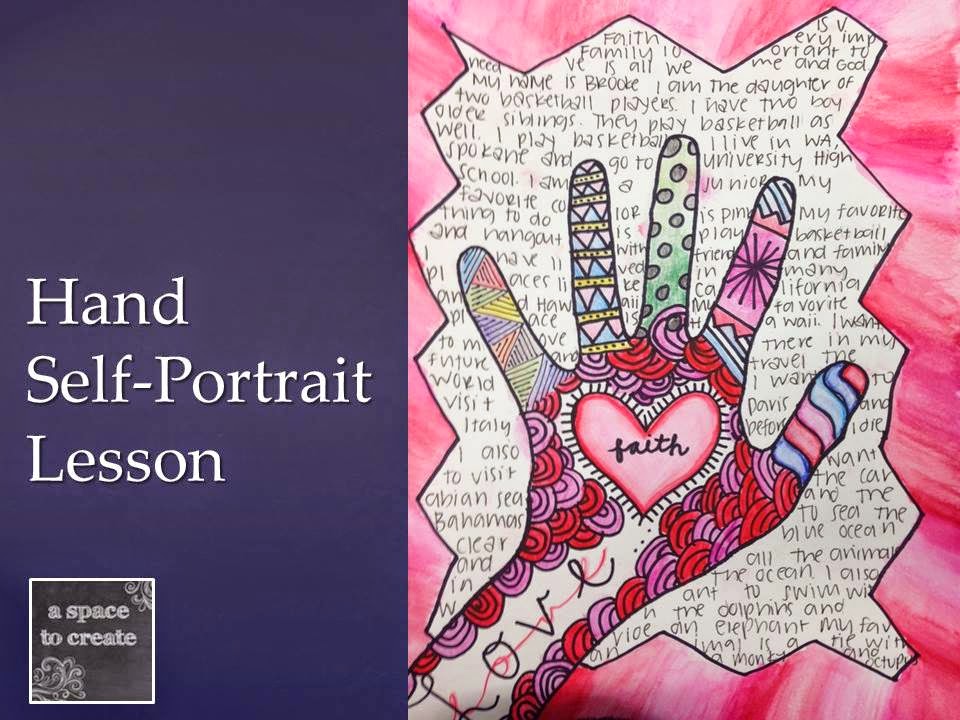
Checkout this Hand Self-Portrait lesson that I use in my art classroom. The English Language Arts teachers have begun to incorporate it into their classrooms as well.

I learn so much about my students with this lesson. It is amazing what they will share with you if you ask them to.

Hand Self-Portrait Lesson:

  • Medium - Watercolor Pencils or Colored Pencils or Markers
  • Project Length - 2-3 days
  • Grade - 3rd grade through 8th grade
  • Subject - Art, Creative Writing, English Language Arts
  • Objective - Create a piece of art using color theory, pattern, rhythm, variety and unity that identifies a core belief about yourself and serves as a self-portrait.  
  • Materials - Watercolor pencils, brushes, water cups, watercolor paper if using watercolor pencils. If using colored pencils or markers, just paper, permanent markers, thumbnail worksheet, zentangle ideas to get started, YouTube videos to use as an anticipatory set.

Start by showing students a video of Zentangles. Here are a couple  that I like, but search and you can find a ton of different examples.

http://youtu.be/R_t_34mchtw
http://youtu.be/56n7_1FGgiw

Step 1:
Students trace their hands with a permanent marker, create a fun border that goes under the hand and then choose a word that they think best describes who they are as a person. Students should write this word in the palm of the hand.

Step 2:
Give students a worksheet filled with squares to practice their Zentangles. I have my students practice at least 6 different patterns. I let them use pencil if they feel they need to for the first 3, but require them to use marker directly on the last 3, so that they can do that for their finished hand.


Step 3:
Have students use one of the zentangle patterns in the border area of their hand portrait. I talk about creating rhythm, unity and variety through the use of repetition and patterns and thick and thin lines. Check out my video of that here:


Step 4:
Next have your students add color. We use watercolor pencils, but you can use whatever you have on hand, markers or colored pencils will work great too.


Step 5:
Lastly have the students write out the story of who they are. I have all of my students start with the same line: My name is _________, I am the daughter/son of ___________. And then they take it from there.

Here are a couple of my students work in progress:


Here are a couple of the finished hands:


Have fun with this lesson and make sure you let the students and yourself just enjoy the process of getting to know one another!

If you'd like to purchase this lesson with the Doodle Idea Starter sheets that includes 12 step-by-step zentangle patterns and a Powerpoint you can find that here:

https://www.teacherspayteachers.com/Product/Hand-Self-Portrait-1664637


See you next time,


Monday, January 19, 2015

Valentines and 100th Day of School

I was tossing around the ideas for this months blog post. I was torn between Valentines Day and the 100th Day of School. I thought to myself, "Why not do both?" So I came up with an easy, and FREE idea to share with you lovely teachers.

100 Reasons We "Heart" Our School

See what I did there ^


Please excuse all the weird feet in my pictures. They are our "Staring 2015 off on the 'Write' foot" papers. 

For us, the 100th day of school will be February 6th. I thought this would be a fantastic way to introduce the idea of the 100th day of school with my kids and decorate my classroom for Valentine's Day. 

As a class, we came up with reasons we love our school. Each student came up with a different reasons why they loved our school and I wrote it down on our white board. When then talked about how it would be boring if every student wrote "Miss Strosnider." We talked about how we can write down similar reasons, but not the exact same reasons. We came up with 5 other ways we could say "Miss Strosnider." The students brainstormed and came up with some great responses. We wrote down "My teacher," "Our teacher," "Miss Strosnider teaching us math," "Miss Strosnider teaching us reading" and so on. This was a great lesson for expanding vocabulary when writing. 

Each student had to come up with 5 different reasons why they love our school. I had 18 students that day, 18x5 = 90 reasons, we had some students make an extra fairy. They needed to write them down in a prewriting and I kept a running list so there were no repeats. The students really started to get into their writing when they found out that another student had already wrote down their idea. 


I created these black and white Valentine "fairies" (as my students call them) from clipart by Krista Wallden and Educasong. I printed them off on red, pink, and white construction paper. I printed off the copy of the boy and girl on white paper for their favorite thing they love about our school. 


I typed up all their responses, to make sure there were not any duplicates, and gave them each a copy. I passed out their one white response paper, a sharpie, and their list. They had to pick their favorite reasons why they love our school from their list and write it on the white paper. 


I collected the paper and allowed them to pick between the different fairies to write the rest of their responses. They cut out the red and pink papers and we hung them in the hallway. 


For centers, I allowed them to use "Miss Strosnider's REAL art supplies" to water color their white responses. I let them use my Prismacolor water color pencils. I wanted them to take pride in their work, and all of them really took their time and made amazing fairies. You can have your students use regular water colors have them color their white fairies. 


Here are some pictures of the final product hanging in my hallway. I love how their favorites stand out agains the red and pink fairies. 


To make the banner:
Print off the banner on thick card stock, cut and laminate. Punch two holes at the top to string your ribbon through. This took an entire 6 yard ribbon spool. To help with stringing the letters, add some tick packaging tape around the end and form a point. This will help keep the ribbon from fraying. 

You can grab this banner and all the materials for free by clicking on the image below: