Pages

Showing posts with label Organization. Show all posts
Saturday, April 9, 2016
Friday, March 18, 2016

Guided Reading - Organization and Support Tools

Hi everyone!

We have about two and a half months left of school. We're working hard in our guided reading groups, so students can progress as much as possible with their reading by the end of the school year.

I'm always trying to make the time I spend with my reading groups as effective as possible. That means I have to have materials organized and easily accessible. I thought I'd share a few of my favorite tools that I've found helpful for teaching guided reading groups and organizing the materials we use.

I use The Next Step in Guided Reading by Jan Richardson. It includes detailed lesson plans for leveled readers (Fountas and Pinnell levels).


The lessons last for 20-25 minutes. I keep the materials and tools we use on a bookshelf that's right behind my guided reading table.


The teachers at my school have access to guided reading books that they check out from our school library. I keep the guided reading books in labeled bins in my classroom.


The bins sit on the bookshelf that's right behind my desk. It's perfect for easy access. The bins are extra wide. They can even hold oversized books that I sometimes use for guided reading. They come with clear plastic dividers. I'm able to keep the books separated by reading group or reading level. They come in a variety of colors. You can find them at Really Good Stuff®.

I work on high-frequency word practice with some of my reading groups. Sometimes the students write on white boards. 


Sometimes they make the words using magnet boards.


These are the 6" x 9" size. They're a perfect size for students. They don't take up much room, especially when I'm working with 6 students in a group. The ones I use are magnetic. I'm able to use them for making words. I use the larger size (9" x 12" for demonstrations).

I also find it useful to have larger magnetic boards.


They come in handy when students are making more than one word at a time. The white boards and magnet boards come from Lakeshore®.

I keep the magnet letters in plastic boxes.


These I use only for guided reading activities. It's especially helpful that the compartments are labeled and are large enough that the letters come out easily. They're all lowercase letters. All the consonant letters are blue and the vowels are red. It's exactly what I need when working with vowel sound spellings. It came as a kit. You can find them at Really Good Stuff®.


I have sound box templates inserted into one side and analogy charts inserted into the other side. They save me so much time. I never have to run off extra copies, because they're reusable. Students can easily write and erase their answers. My students love when we do sound boxes and analogy charts. I think it's because they can use the markers, and they have fun erasing the pockets. It definitely keeps them engaged in the activities.

An assortment of pens and erasers are a must for our guided reading lessons. 


I place the caddy on the table. I can distribute and collect materials quickly. They're kept all together in one convenient place. The caddy fits all that we use. It's sturdy and durable. The ones I use are in primary colors. Lakeshore® has them in a variety of bright colors. 

What do you use during your guided reading groups? How do you organize them? I'd love to hear about any ideas or tips. 


Sunday, February 7, 2016

The Amazing Binder Clip

I'm a little OCD when it comes to school supplies (what teacher isn't!!) and one of the tools I like to hoard is binder clips.  I looked through my carefully organized drawer of binder clips (in 5 different sizes and 4 colors) and tried to figure out some ways I could use them up!  Here's a few ideas that I came up with that really helped me get some spaces more organized!

 We have a station for charging all our devices, but the cords keep falling down, so if you clip a binder clip on a desk or shelf, you can feed those little cords right through them (and for the small ones, clip them on with a smaller binder clip to the large clip) and they won't fall down anymore! This also keeps them super untangled!
 I love to read chapter books (this one is from the Magic Tree House series), but I often lose my place.  Not anymore!  Just pop a small binder clip on and never lose your place again!
 How many of these tiered folder holders do you have?  I've got three! One sits just to the right of my desk, close enough for me to see from my computer screen and phone.  I clip the staff directory/roster here and I always have every classroom extension number handy--and I can't lose it this way! 

 I also have a set of wire shelves next to my desk holding all my teacher books, but the little trinkets and bracelets that my sweet students give me often fall through the shelves, so enter the binder clip! I can clip one on the side of the shelf, hold their sweet gifts and hold up other important papers as well!

 How many of you have LOTS of little scrap papers floating around on your desk? They need a home, but not in a drawer? Yeah, me too! Use a large binder clip to act as a giant paper clip, and as a bonus, it will stand up on its own! 

 I use binder clips to display student work in the hallway too! Makes it super simple to change out their work (so easy they can do it!) and holds it on firmly attached! Much better than clothes pins!


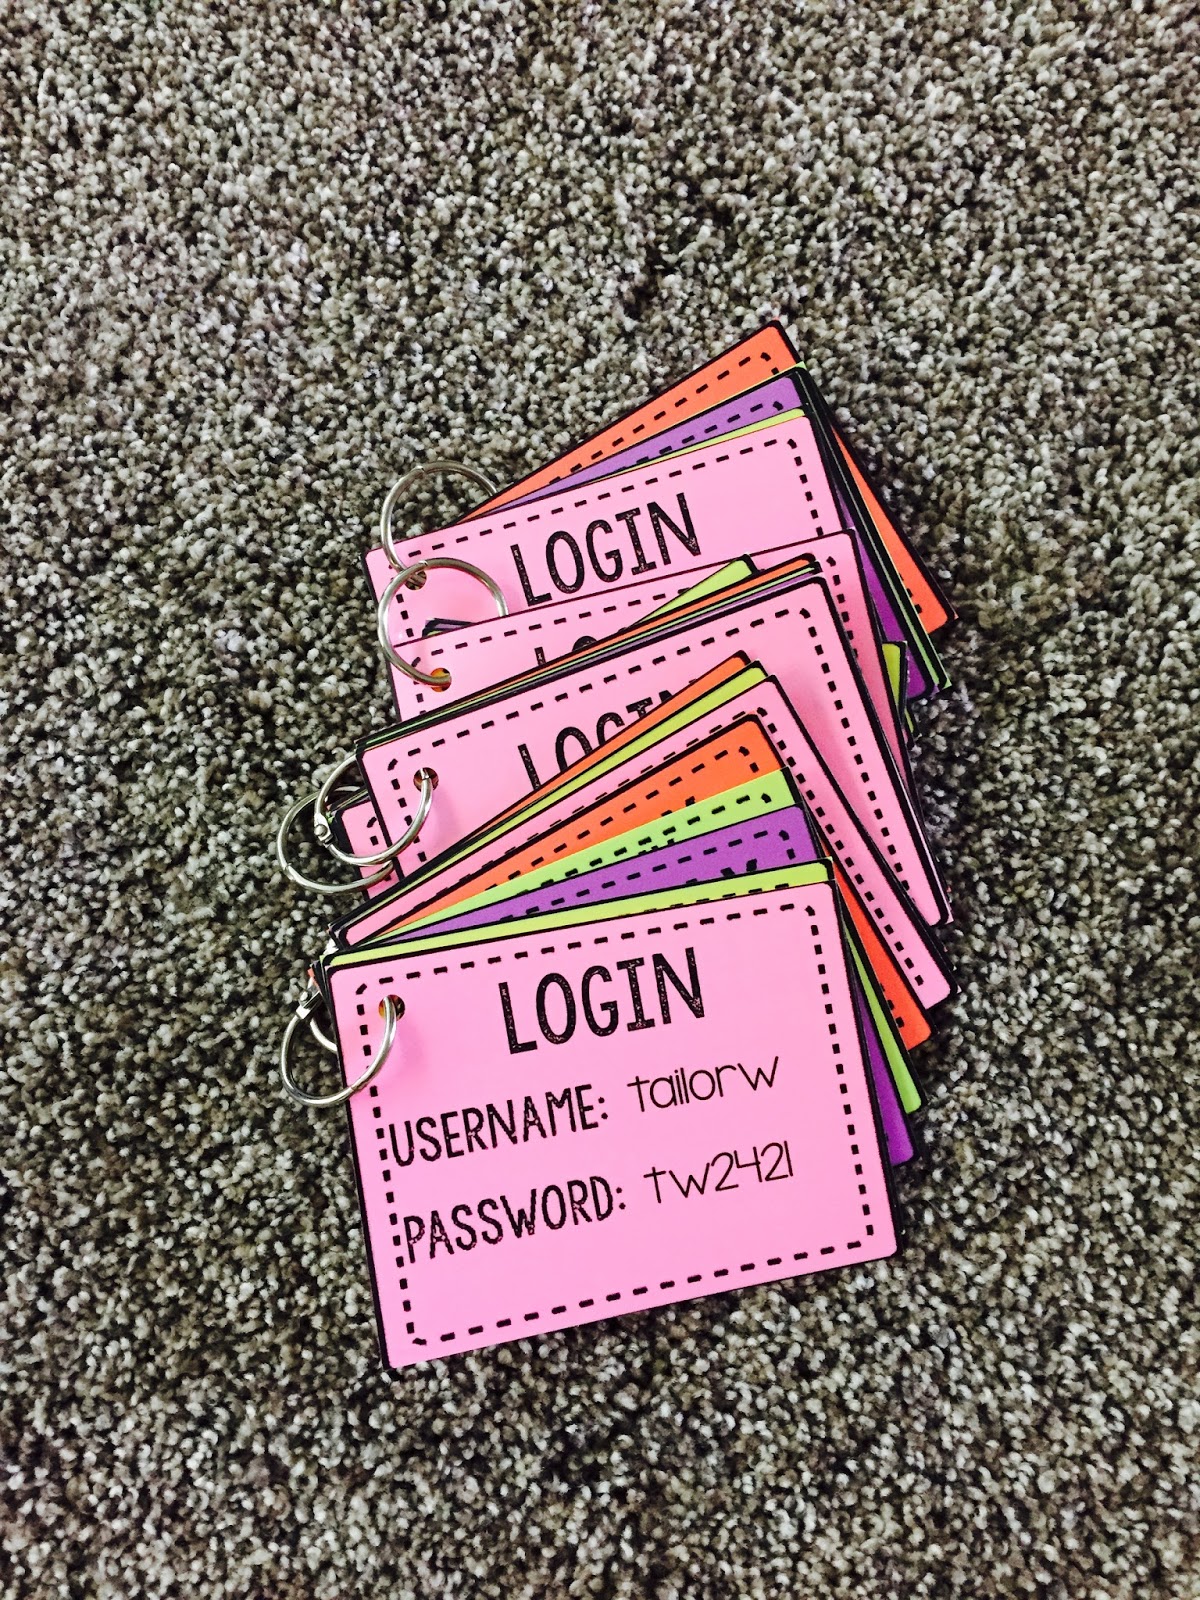
We have a computer program that requires us to have a separate user name and log in for each student.  You can see how beat up these papers are and we are only 1/2 through the year! So by using a binder clip and hanging it from a Command Hook, we can keep them together for longer and they won't get lost!
 
 Short on space in your classroom? I have curtains up over all my open bookcases to help cut down on the clutter you see, but to also keep my kids with sensory needs happy. :)  You can use binder clips to clip on large charts and other student work to the front of them to make better use of your space!

 I just discovered this idea and I LOVE it! I have paper lanterns and lots of other student work hanging from my ceiling, but the old paper clips and strings keep falling out of the ceiling tiles.  So, by tying a string to the handle part of the binder clip, you can clip them to the drop ceiling tiles and they aren't going anywhere! :)

A few years ago, I switched from making labels for student mailboxes each year to using binder clips.  BEST DECISION EVER! Once my students put their mail in their mailboxes, we couldn't see their names any more, so by using binder clips, we can ALWAYS see their names and know where to put their items. :)

I hope you found a new idea or two that you can use your stash of binder clips for--or maybe you're rushing out the door to buy a big box? 

Come visit me over at Kristen's Kindergarten!


Monday, November 9, 2015

Stay Organized with Bins, Baskets and Trays - Part 1

Happy Monday, everyone! It's Lisa from over at Second Grade Stories. I have a confession to make. I am obsessed with bins. And trays. And baskets.  The Dollar Tree... Big Lots... Target... all very dangerous places for me. I have WAY more containers than I will ever need - and I always seem to buy more.  But that's good, because I use my containers to stay organized in so many ways!


I thought I would give you a tour of my classroom - container style! This is a  picture-heavy post (who knew how many different baskets and bins I used!), but it's filled with ways to stay organized in your classroom.  I discovered I had so many different ways of using containers, I had to break this post up into 2 parts!

My number 1 rule is: Everything needs to have a home!  I find that things start to pile up when I don't have a -- place to put them. Give everything a home and you'll be organized and tidy in no time! Rule number 2: Keep things that you use all the time out and accessible. There is nothing more frustrating that having to look for what you need two or three times a week. If you use it, give it a home out in the open! On with the tour!

This basket is right on a small shelf by my door. If it's finished, it gets put in the finished work basket. I've tried other systems - file folders with student numbers, trays for each subject... they never worked for me. Everything goes in here and my kiddos who have later buses love taking out the papers at the end of the day and organizing them so all the same ones are in one pile, they're all facing the same way, etc. Then I decide if it's going in my folder to be graded and entered into my gradebook, or in a different pile to be checked off and sent home.


These are our mailboxes for things that go home. I LOVE these mailboxes. A friend made them for me a few years ago. They are wooden and very sturdy and are going to last forever. WELL worth the cost of the materials! I put the name tags on the sides with Velcro so I can change them easily every year without scraping off the old nametag. Finished work that we have done together, notices, Friday folders, it all goes here to go home.
TIP: If you have Friday folders or something where all papers go home on a certain day, try this - sort everything into mailboxes FIRST, THEN pull out each pile and put it into the student's folder. This works so much better for me than spreading everything on the floor and trying to sort that way.

Which brings me to this tray. I have two of them on top of my mailboxes. One is for papers to go home later in the week (like I said, we do Friday folders) and the other is for notices. (I put those in a separate pile so they go on top of all the work.) Oftentimes I'll have student put papers directly in this tray if we've done it together and I don't need to look at it again. It stops the monster paper file from growing and streamlines my grading. I make notes on sticky notes about students who might have needed help so I have that information.


We have four ipads in our room. I grabbed these trays from the staff lounge over the summer and spray painted them blue. They work perfectly and are easy for my kiddos to slide the ipads in and out. Can't say as much for the mess of cords behind the trays. I'm still working on that one. (The cases are from Amazon - here's the link.)


I keep some of my classroom library books in these bins from The Dollar Tree. These are the books my kiddos choose from for reading workshop. I have other displays in different places in the room for themes, holidays etc. I switch out books every month or so. I've found keeping books in bins like this allows students to browse more easily. The labels keep everything organized. (The label holders are from Really Good Stuff. They are expensive, but well worth it. I make my own paper labels and just slide them in. You can see them here.)


We use clipboards all the time, so it's important for me to have an easy way to store them. (We have alternative seating, so my kiddos often choose to work on the floor - you can read more about that {HERE}) I went the easy route - two labeled bins that sit on the counter. I had to make rules last year for getting clipboards - you take the first clipboard that's on the top - no "fishing" for the one you want. You can switch with someone later. This year it's not really an issue. The water bottle basket came out of necessity. I hate sweaty bottles that leak (or spill) on the tables and papers. Grab and go. (We did have to have a conversation that this was not the water cooler and you can't stand there sipping and chatting all day :-)

Looking at this picture, I'm not sure how proud I am of it. But it's real - and it really is organized. I am blessed to have a double closet in my room (tow of them actually) to store things. This one stores school supplies, construction paper, art materials, etc. Those shelves are really deep and I was always losing things behind everything. I decide one summer to purchase Sterilite 3-drawer bins from WalMart and stick them in the closet.  Ta-dah! It may not LOOK beautiful, but I know where every kind of pencil, marker, sticky note, etc. is ... and I don't have to take out half the closet to find it. Use bins and drawers to store all those little things and you'll find you have so much more room for other stuff! Now if only I could do the same for my other closet with the Ziploc bags, paper plates, etc. Ugh.


This "toolkit" sits on our back counter. It has the things we always need to replace - and my kiddos know if they need something they can just come and get it. It's from the hardware section at Home Depot and the drawers tip forward when they open. A simple idea that has really helped. (And you can see the plastic bag with the glue sticks with no caps. We seem to lose the caps. Keeping them in the plastic bag keeps them from drying out and when a lone cap shows up we can just find it's mate!)


We use dice almost every day during our math time. I have - or can come up with - a dice game for just about any math concept. And we use them for reading, vocab and spelling games, too. These drawers contain the most-used dice: foam 6-sided dice (so quiet! link here), plastic 10-sided dice (also from Amazon - link here) and regular 6-sided dice. Since we use them so much, they needed their own place. TIP: If you use something a lot, keep it out somewhere in the classroom. It makes it much easier than digging through a closet or drawer three times a week! The dice mats on the top are just pieces of felt. My kiddos bring one to wherever they are working and roll the dice on it. It not only keeps things quieter when 20+ kids are rolling dice, but it helps them keep the dice somewhat ON the dice mat.


That's it for Part 1! We've only made it halfway around my room and I've already showed you nine different ways to stay organized using bins and baskets! Now head on over to my my blog for Part 2 and see even more ways I keep things organized! In the meantime, leave a comment and share your thoughts - how do you use bins and baskets to stay organized?



Wednesday, September 9, 2015

The Nightmare Known Only as Computer Lab

I don't know about you all, but my first couple of years of teaching I dreaded taking my kids to computer lab.  It was a total love/hate relationship.  On one hand I could use that time to get so much accomplished: grade spelling tests, get new lists together, finish reading assessments, work one-on-one with some of my kiddos.  On the other hand, getting my kids to log in within the 45 minute computer lab time was a challenge to say the least.  Forget getting into a membership website that requires them entering a username and password.  Pshhh! Come on!

Well, a couple of years ago I got the bright idea to just give my kids individual cards for each website or program that we used frequently.  That, my friends, was a game changer.  Each year I tried to make it a little better.  Until finally, for the last 2-3 years I've created a login loop for my firsties.  Let me just say that I'll never go back and I don't know how I did it all before. Maybe that's why I'm almost completely gray under all of the hair color and highlights.

If you go to a computer lab, or even if you don't and just have classroom computers that your kids use, where they have to login to their profile, account, etc. then this is definitely a handy tool for you to use. Yes, they are a little time consuming to make at the most stressful time of the year for us teachers. But I promise they will save you SO much time (and gray hairs).  They are editable so that all you have to do is type in the info for each student.  I like to take it a step farther and color code the individual login cards so that there is no room for confusion even if my firsties can't READ what the card says yet.

Here's the simple tool that can take the nightmare out of computer lab and logging your kiddos in.


There are 3 different cover options.
This one comes in aqua, pink, gray, lime green, and purple.
The one comes in aqua, pink, red, lime green, orange, and yellow.
There is also a blackline for those of you who are saving on ink.
There are cards for STAR, Xtramath, Track My Progress, MobyMax, Nat Geo, LearnZillion, Tenmarks, IXL, Edmodo, Hearbuilder, and Prodigy.
And of course a blank template.

Here's an example of a color coded loop (minus the front cover).

I know many of you are just entering the back to school beginning of the year madness and some of us are a couple of weeks in. Either way, this would definitely be a useful tool for you. I've marked it half off until Saturday.


Until next time friends.


Wednesday, August 12, 2015

5 Time-Saving Tips for Teachers

Happy Wednesday! I'm Krista from The Knitted Apple and I'm excited to be back with another blog post on Who's Who!

There is a major change that happens at this time of the year.  The switch from the carefree summer schedule (where I’m not even sure of the day) to the minute-by-minute scheduling that is part of teaching.   Our shiny new teacher calendars and planners are opened for the first time and quickly filled with to-do lists, reminders, and meetings.

It’s always a jolt to return to a such a rigid schedule, and there is never enough time to get everything done.  I manage to squeak out just a little more time in the day by using time-saving strategies. Here are the top five time-savers that I use every day.

1. Use a timer.
I consider a timer to be a time-saver because it helps me use time effectively.  I use a timer regularly during math, reading, and writing workshop.  Before I used a timer my mini lessons would run long and I would lose time needed for meeting with small groups.  I would then have to make up that time the next day, sometimes putting me behind for the rest of the week.  Now  I use a small digital timer to limit my mini lesson time.  When the timer goes off  I wrap up my thoughts and move into working with small groups or individual students.

2. Simplify your conference records.
When conferring with students during writing or reading workshop,  I try to spend more time listening and less time writing.  When I first started conferring with students I took meticulous notes as individual students read aloud or shared writing pieces with me.  Unfortunately I wasn’t the best at giving feedback because I was too busy recording data.  Now I give students my full attention, which results in a more productive conference.  As soon as they get up to leave, I quickly jot down the highlights of the session.  I find that I'm able to meet with more students during the time given and have more useful information which I can use to plan the next conference.

3. Organize your everyday items. 
This is the one I struggle with the most, especially at home.  I am constantly looking for my sunglasses, phone, keys, etc.  At school I am a bit more disciplined.  Near my desk I have wall hooks for those items I need every day, like my classroom keys, badge, and recess whistle.  The few times I have forgotten to place these items in their "home" have resulted in frustration and wasted time.

4. Create a PowerPoint slide for morning work or directions.
One time-saver I am consistent with is the use of single slides for morning work and directions.   I use PowerPoint to create a single slide like the one shown below and display it on the large projector screen. I make it engaging for students by using a school or seasonal theme.  Students are trained from the beginning of the year to check the screen as they enter the classroom.  Mornings are now more focused as students complete their tasks independently.   I am free to greet students, check homework, and submit attendance.  I save this slide on my computer desktop and use it every day, changing the information as needed.


5.  Use newsletter templates.  I mentioned in tip #4 that I create a single PowerPoint slide for morning work and quickly change it every day as needed.  I also use templates for weekly newsletters, which communicate curriculum and other important news to parents.  Once the template is created I can quickly change the information each week.  The newsletter shown below is part of my Superhero Newsletter Templates.  


Hopefully these time-savers will be useful to you.  I’d love to hear your time-saving tips.  Please post your tips in the comments! 

If you are interested in viewing the Superhero PowerPoint and Newsletter Templates as shown in the pictures, just click the images above.  I also have many free newsletter templates for you to try! Click here to check out the free newsletter templates in my TpT store

Happy Time-Saving!