Pages

Showing posts with label K-5. Show all posts
Monday, February 8, 2016

The Best Parent Teacher Conference Ever


Are you looking to spice up your Parent/Teacher Conference?  I would like to share what works well for me!  

1.  Set up student work for parents to browse through while waiting.  I usually keep a writing portfolio of all my students final copies.  I set them out during conferences and then send it home at the end of the year.  Parents love it!


2.  Make sure your bulletin board is updated with student work.

3.  Place a sign in sheet on a podium or table outside your classroom. Make it look cute with flowers, a cup with pens, and even a table cloth over the podium.  This shows that you are welcoming and eases any parent fears.

4.  Include your students in the conference!  Whether they are physically there or you simply share their reflections, it is best to let the student lead the conference!  It takes so much of the blame away from the teacher.  Students take ownership of their learning and parents get to see what the students think about their learning.  It is a simple form that covers CLASS PERFORMANCE AND WORK HABITS, HOMEWORK PERFORMANCE AND STUDY HABITS,  BEHAVIOR, GRADES AND GOALS.  Most students are brutally honest and you don't have to be the one to let parents know about any difficulties.  If there is a discrepancy in your thoughts VS students thoughts, it is easy to explain.  Usually you are telling the parent that the student was hard on himself and you would have rated them higher.  For a short time, I will have this form free for visiting this awesome Who's Who Blog!  Click below to grab it!


I hope these ideas help you with a happy conference experience.  If you don't get to grab the freebie in time, you are welcome to copy the ideas from it!  

Pam 


Connect With Me!


Saturday, January 16, 2016

School Gardening

We are fortunate that our school has a school garden. We think of it as an outdoor classroom. Our first grade students have an end of the day science rotation. I teach the first graders about living and non-living things and use the garden for hands-on activities. I enjoy listening to the excitement in children's voices as they discover new kinds of plants and garden creatures.


We also have a composting bin in the garden. The children are currently learning about worms and vermicomposting.


We use EarthBOX® gardens that are housed in front of our rooms and throughout the school.


Lettuce and cherry tomatoes are growing in this box.


This is one of several EarthBOX® gardens that are placed throughout our school. Notice the signs that contain information about the plants.


The signs include QR codes that direct students to videos and additional information about the plants.

I used to order caterpillars and set up a net in our classroom to observe the life cycle of a butterfly. Now we are able to observe the process naturally right outside our classroom door.


We are currently growing milkweed (Monarch butterflies love to lay eggs on the leaves of the plant.), cherry tomatoes (a few green ones can be seen in the background), and strawberries in our EarthBOX®.

If you'd like more information about the garden containers or would like to have your own EarthBOX® garden, click HERE. We use ours all year long!


The site has planting and gardening resources, too. The system is easy to use. Students can plant and maintain the garden. I love the real world application of having one. When the fruits and vegetables are ripe and ready to be picked, it's fun to prepare a vegetable or fruit salad with them. I've found that for some students, it's the first time they've seen or tasted many of the fruits and vegetables we grow.

These are a couple of my favorite classroom gardening books:

 It's Our Garden by George Ancona.
Children learn about creating a school garden.

How Groundhog's Garden Grew by Lynne Cherry
Children learn about planting seeds, harvesting, and eating home-grown food as Squirrel teaches Little Groundhog all about gardening.

I'd love to hear about your school garden and any garden books you find helpful.


Saturday, January 9, 2016

Engaging Manipulatives

Hello there! Today I am here from K's Classroom Kreations to share some quick and simple math ideas.
One of my favorite ways to inspire and engage my young students (first grade) is through the use of themed manipulatives. I like to gather seasonal items from craft stores, party supply stores, and dollar stores. I store everything in one box- easy to keep track of and swap out.


Sometimes the objects are seasonal like these bats, eyeballs, acorns, pumpkin beads/pie plates, and jingle bells. I pull them out as the season approaches.


Sometimes I like to use more generic objects as game pieces (cars, dinosaur toys, bugs, mini erasers).


These counters came from a teaching supply store and come in all different themes (ocean, transportation, pets, farm animals, etc.).


I am sure if you search your house or classroom you can find tons of small objects to reuse. We use them as counters when solving word problems, game pieces for themed games, and manipulatives for center time.
One simple math game for decomposing numbers is Bellies Up/Bellies Down where students drop a handful of bug toys (you can give them a number to start with) and then count how many are facing up and down. This helps with finding combinations of a certain number. A variety of counter types could be used. The game can also be played with two different colored items (like buttons or pom-poms). Students can count how many of each color are in a handful or scoop of objects.

Do you have any manipulatives that your students love using? I'd love to hear from you and hope you  can inspire your young students as well!


Wednesday, August 5, 2015

Setting up and Managing Effective Group (Peer) Work in the Classroom

Have you had success with group work in your classroom or do you try to avoid it because it can get a little crazy at times? Hi, I'm Kelsea from Teacher Gems and I'm excited to share some tips with you today for setting up and managing effective group (peer) work in the classroom. If you are one who tends to avoid group work (because, well let's face it, it can be a lot of work!) I want to challenge you to give it another try because of the many benefits. I believe that each student has a unique set of strengths and weaknesses. When we pair students up in groups there are more opportunities (like assigning specific roles) to cater to individual strengths. Group work can also help prepare students for real life where they will be interacting with others on a daily basis. The social skills learned from group work alone can be worth the effort! And of course we can't forget the well known fact that two heads are better than one! In order to get the most out of your group work time it is important to have a structure in place and set up expectations prior to beginning a project. Here are 6 steps to help you get the most out of group work in your classroom.


Step 1: Selecting Groups

The first step to successful group work is setting up the groups. This may sound like a simple step but it is actually a very important step that is often overlooked. When coming up with groups there are several things you should consider. First, take into account the project your students will be working on and how many students make sense for that particular project. Anticipate the different jobs/roles that the task/project can be broken into to help determine the number of students for each group.

Once you have determined an appropriate number of students for each group it is time to figure out which students to pair up. There are several ways to do this. One approach is to be intentional about who you pair up and try to compliment a child's weakness with another child's strength and vice versa. Another school of thought it to allow students to be randomly paired in order for them to learn to work with students of differing opinions and personalities. One simple way is to have students work with the other students in their row (if you have desks) or at their table (if you have tables). Another idea is to randomly select students (which was my 4th graders preferred method). All you need for this idea is an old soup can, a little cutesy duck tape and some popsicle sticks. Peel the label off the can and wrap it with decorative duck tape (be sure to wrap around the inside lid so you don’t cut yourself like I did!). Then write each student's name on a popsicle stick and place them in the can. Now when you are ready to select students for a particular group you can just draw out popsicle sticks. I love using the can method because you can use it throughout the year for lots of other things too like picking who gets to present first, creating a new seating chart, etc. Sometimes I would even have other students pick out the names so they knew I didn’t rig it! 

Step 2: Outlining & Assigning Roles/Jobs

Now that you have your groups in place it is time to outline the specific roles or jobs necessary for the task and assign them to each student. Here is where you want to play to your students' strengths. *Side note: rotating jobs (for different projects) can also allow for students to improve on their weaknesses while providing opportunities for each student to try out a new role (and eliminate the "that's not fair she got to do that last time" comments). 

There are several roles possible and each project could have a different set of roles. In some cases you will want to assign the same role to several group members (such as the illustrator role if the project is a poster that will be heavy in illustrations). Here are a few suggestions for roles:

1. Writer, Recorder or Note-Taker: Their job would be to write down or record all the important information needed for the project or poster. Strengths to consider for this role would be someone who is attentive to detail (yet able to see the big picture) and someone with neat handwriting.

2. Time Keeper: This person's job is to keep track of the time and help keep the group on task. You can give them a stop watch or have them watch the clock. Strengths to consider for this role would be someone who is able to think ahead and break apart a task into time segments or is not afraid to call out times to the group. You may want to instruct them to call out how many minutes are left after every 5 min. or so (to avoid distracting the group every minute).


3. Materials Manager: This person's role is to gather all the needed materials for the project and help keep them organized while the work is being done. They can also make sure the materials get put back in the correct place when the job is done.


4. Illustrator: The illustrator draws and colors all the pictures for the poster. Remember you may want to assign this role to more than one student if the project is illustration heavy such as a poster. Strengths to consider for this role is creativity, attention to detail and care of materials.

5. Researcher: This can be a role assigned to one person or assigned to the group as a whole. In this role the person would look up any information needed to complete the project and relay it to the note-taker. Strengths to consider for this role are reading ability, reading rate and the ability to skim and pick out key details.

6. Presenter: This person's role is to be the spokesperson for the group when presenting their project or poster. They should show and tell the class what the project or poster is all about. Strengths to consider for this role are speaking skills, eye contact and summarizing skills.

7. Clean-Up Crew: This is a role that I like to assign to the entire group. Working as a team to clean up is an important skill to emphasize. The materials manager can oversee the clean-up and help delegate tasks for the rest of the group to accomplish.

These are just a few ideas for roles to get you started but the options are endless! Another idea for assigning roles would be to have students volunteer or select roles within their own group.

Step 3: Setting Up Expectations

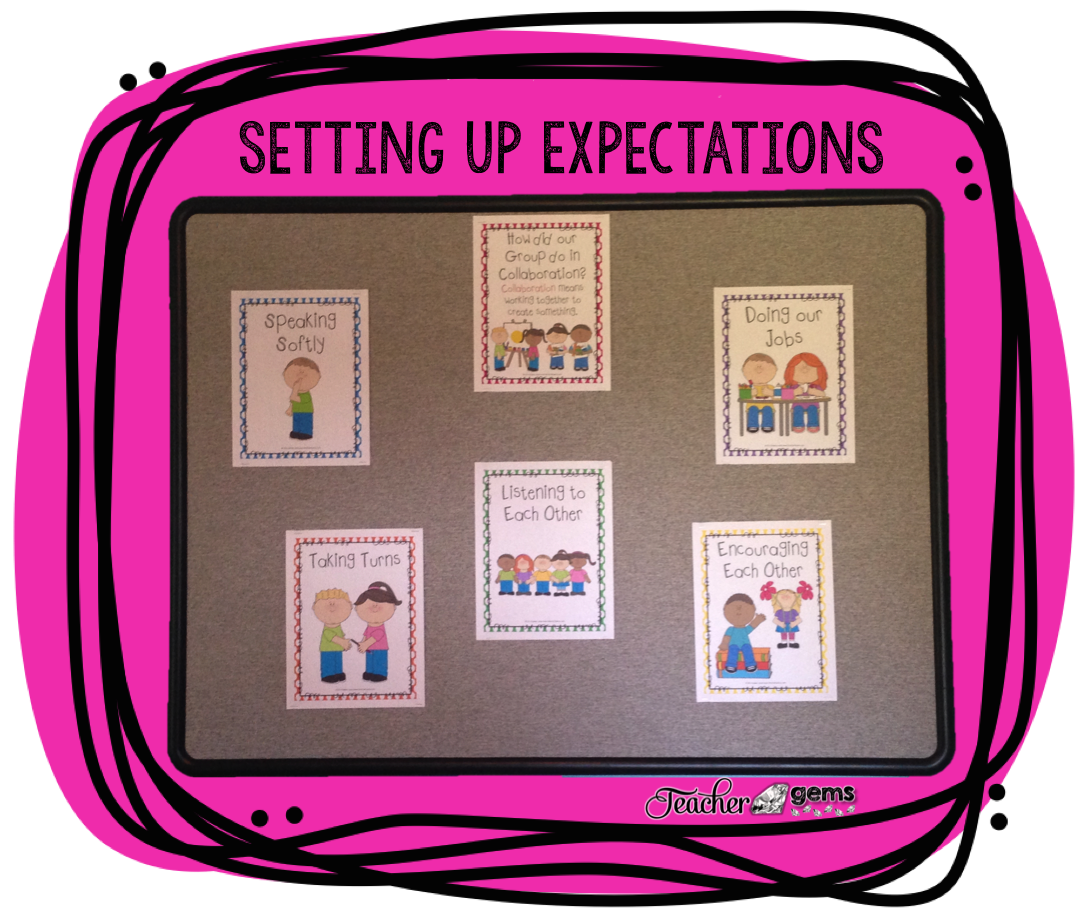
Before sending off your now eager learners, it is important to set up expectations for group work in general. What is the goal of your project? How much time should you spend on each task? What types of behaviors are expected? Here is where you can teach your students about collaboration and what it means (working together to create something). I created these posters to help students learn the key characteristics of successful group work: speaking softly, listening to each other, taking turns, encouraging each other and doing our jobs.


Step 4: Defining a Work Space

Make sure to designate a specific area of the room for each group to work. Have the necessary materials ready ahead of time and make sure the materials manager knows where to find them. Defining a work space helps cut down on messes and helps groups stay on task since they are not being interrupted by other groups. If you don't have enough separate spaces for groups to work within the classroom send one or two groups to a quiet place in the hallway. Make sure they know to be quiet and not interrupt any of the other classes or they will lose their privilege of working in the hallway! 

Step 5: Group Work in Action

Now it's time to let your students work! They will be excited to get started. Make sure there are no questions before you begin and then walk around the room and monitor groups as they work. This can be a great time to take some anecdotal notes. Note how students are communicating, how students are fulfilling their roles and which students look like they could take on more responsibilities in the future. 

Step 6: Group Evaluations/Self-Assessments

When students have completed their projects (including presentations if you have them), have students reflect on how they feel they did as a group. What things went well and what areas could use improvement? I like to provide each student with a simple chart like the one pictured below that they can complete immediately following the completion of their project. You can choose to have groups fill out one evaluation chart together or have each student complete one and then compare the results.


So there you go! Give it a try! If you are interested in the posters or chart pictured above you can find them in my TpT store by clicking on the image below.


Thanks for reading! Be sure to stop by my blog and say hello!


Sunday, March 15, 2015

Using Concept Maps in Math Class


Math Concept Maps


Hello! I am Greg Coleman from Mr Elementary Math and I am excited to write my first post for Who's Who and Who's New.

Concept maps are not just for the reading block!  We can use them effectively during math lessons as well.  You may be wondering, "What are concept maps?" Let me explain.  Concept maps are graphic organizers that show a connection or a relationship between concepts. Concept maps can look different from each other, but have two major characteristics in common.  The concepts are inside a given shape and lines or arrows are used to link different concepts together.

In general, concept maps move from broad ideas to specific details and the main topic is usually located in the center.  There are many variations of concept maps, but I wanted to focus on one that assists with student acquisition of vocabulary.  Students need to be able to know and use academic vocabulary when communicating.  For example, one of the common core standards of mathematical practice states that students must be able to attend to precision (Standards of Mathematical Practice   # 6). Specifically, they are expected to "use clear definitions in discussions with others and in their own reasoning."

Below you will find a images of a concept/vocabulary map that you can use when teaching math concepts and vocabulary in the classroom.  In fact, this graphic organizer can be used when teaching any topic in the classroom.  Here are some examples of completed math concept and word maps that can be used across grade levels. Click on the pictures to get FREE templates of the concept map and the vocabulary map.


Math Word Map Example


Math Concept Map Example


Two important things to point out with these maps are the Definition vs. In My Own Words sections and the Examples vs. Non-Examples.  First the Definition is more like the "official" definition, or what you would find in a dictionary.  The In My Own Words box is more of a what could I say to help me remember this concept or word. It could be a phrase or a short sentence.  Last, providing examples and non-examples deepen student understanding of a topic because they are generating similarities and differences.

Here is a simple lesson cycle that can be used when introducing concept maps in your classroom. Click on the image to get a printable copy.

Concept Map Lesson Cycle


In sum, there are many benefits to using concept maps. Check out some of the benefits below:

- A great tool for collecting and organizing thoughts
- Provides a model for visual learners
- A powerful vocabulary strategy
- This strategy can be used across content areas
- This strategy is effective in all grade levels


If you like this blog post about using concept maps in the math classroom, check out my post about teaching math vocabulary with Frayer models and math vocabulary flip books HERE.  Find even more great math resources in my My Elementary Math Store.


Tuesday, January 20, 2015

Kids, Yoga, and the Brain


Friends~Yoga is an incredible exercise for both the brain and the body.  That is why I love that at my school ALL students have PE everyday and one of those days is a YOGA class.  
(We even have recess too!)
Yep! That's right! Grades K-8. 
Once a week, my students head to our yoga room, take off their shoes, and roll out their mats.  Why? because we want our students to connect their brains to their body movements! We want our students to be healthy active learners.  
Yoga is a fantastic way for children to activate both sides of their brains.  Many yoga poses encourage cross body motions that strengthen the connection between the right and left hemisphere of the brain. 
The right side controls emotions and creativity while the left side handles more logic and numbers.  When both sides of the brain are activated learning becomes easier.  

We all know that students these days are feeling the stress of testing in the classroom.  Some schools are even considering limiting or getting rid of recess!

Yoga allows them to focus on their breathing when stress enters their bodies.  The breathing encourage a release of that stress.  Students that are active and learn to understand their bodies are more confident and able to handle what life throws at them.  

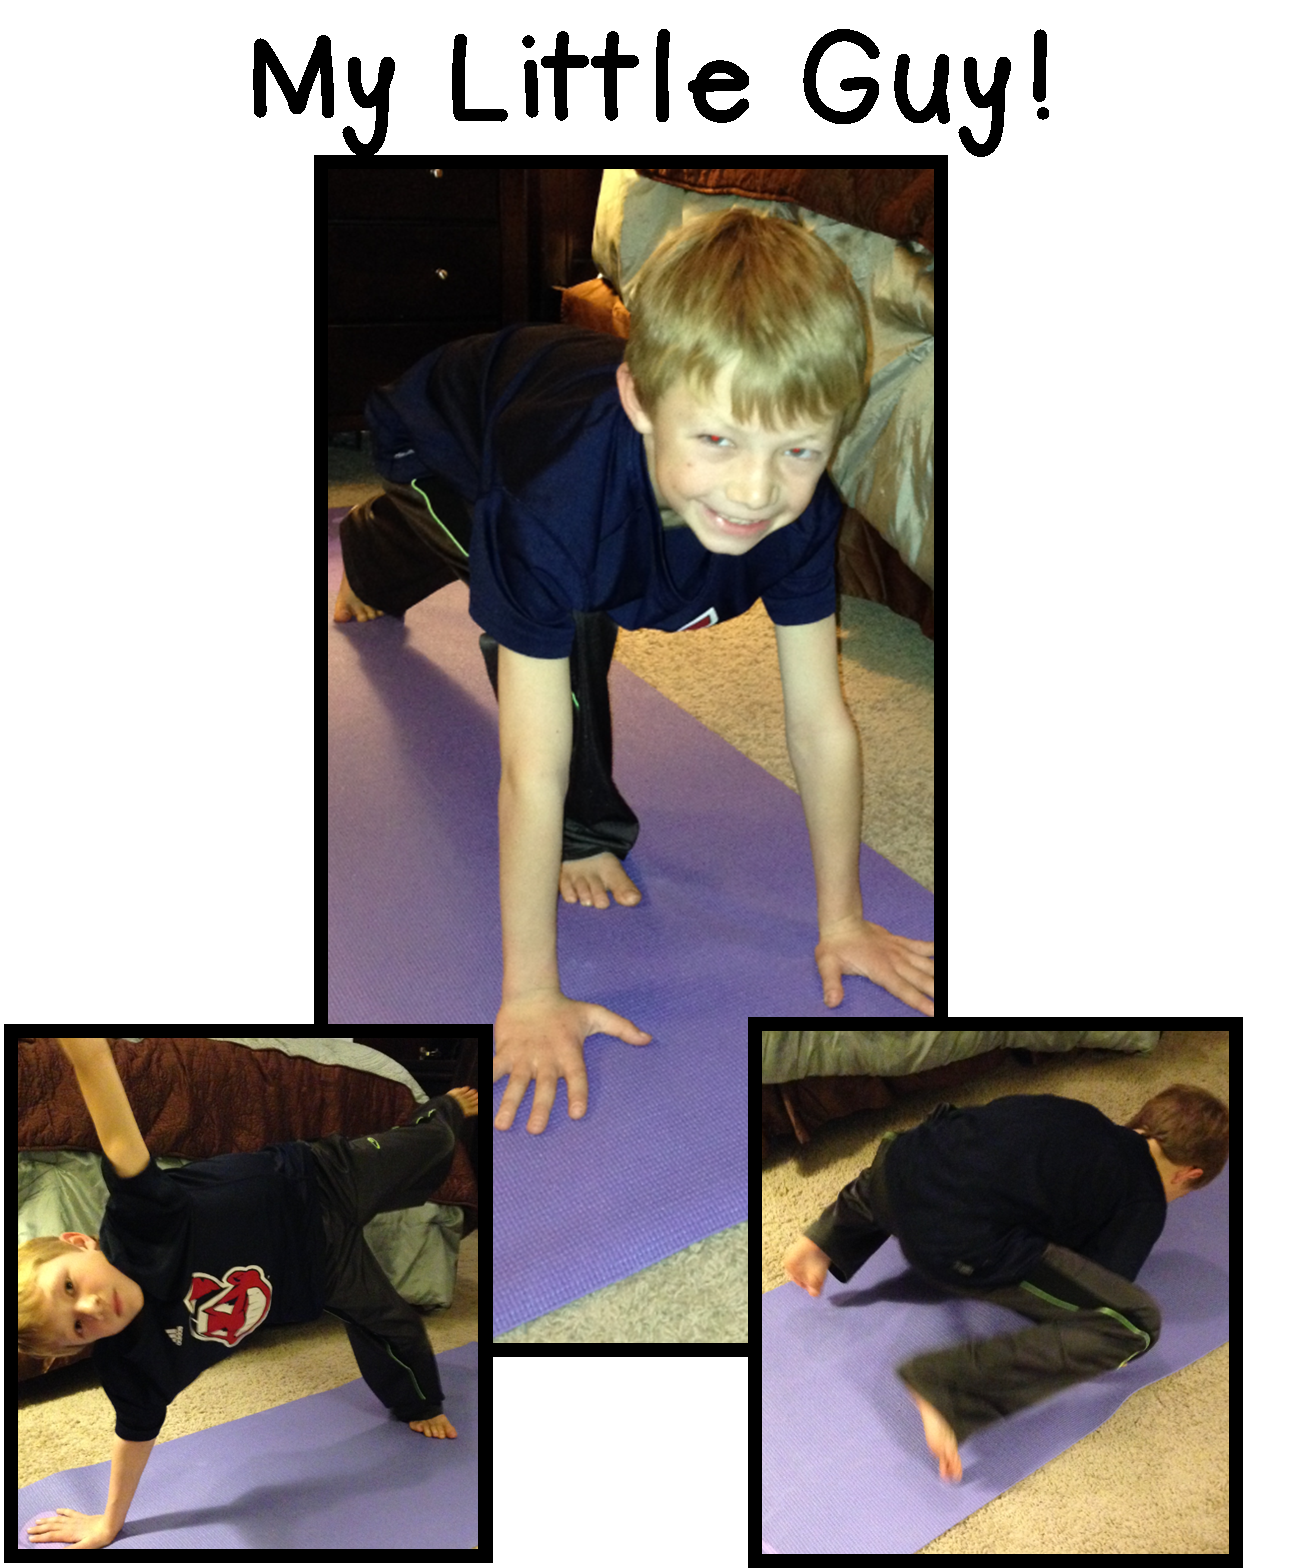
I know from my own daughter, the stress level for our young teens at school can be intense. She relies on the focused breathing that she has learned in yoga to stay in control both at school and on the softball field.  My 3rd grade son loves yoga and was so excited to show you all some of the poses he has learned in school. 


Click the video to see him in action! 

As a teacher, I see the benefit in the classroom     everyday.  We use some of the yoga breathing and cross body activities during our morning meeting and at the end of the day.  My first graders are more focused and centered after their yoga class and it is great for brain breaks in the classroom.  
If you don't have yoga in your school, I encourage you to add it into your weekly routine.  This is a simple video to get you started! 

I just love this poster!  
ABCs of Yoga has some great resources!


~A Yoga pose a day keeps the stress away!


Thursday, January 23, 2014

Interactive Morning Messages

Hi!  I'm Jennifer and I blog over at Elementary School Garden!  I am in my seventh year of teaching 4th grade and am currently at home on maternity leave after giving birth to my first daughter.  I'm very excited to embark on this new blogging adventure with all these amazing bloggers at Who's Who and Who's New.

Today I wanted to talk to you a little about Interactive Morning Messages.


Our district uses a responsive classroom approach.  Each morning we have a morning meeting which includes an interactive morning message.

When I first started teaching I would spend my precious morning minutes creating a fun morning message that would often be ignored by distracted students as they arrived.  How could I save my morning time and present a morning message in a way that would catch students attention immediately as they entered each morning?

I decided to make my morning messages interactive!

How do I do this?  By adding a section at the bottom of each message for students to respond.  I keep a little bin of post-it notes and markers nearby.  I post my morning message up front by our door so it's the first thing students see when they enter our classroom.  They stop, read the message, and immediately respond.  Then, we read and discuss our morning message as part of our morning meeting.

To save time I bring the pad of paper home over breaks or long weekends and write out a months worth of messages all at once.  I follow a simple schedule:

Monday - Weekend Happenings
Tuesday - Social Studies / Science
Wednesday - Math
Thursday - Language Arts
Friday - Riddles, Jokes, and Fun Stuff

This schedule helps me think of new and creative messages rather than falling into a pattern of the same boring posts.

Here are some examples:

This is the message that I plan to post on the first day back from February Break.  This will also be my first day teaching after my long maternity leave.


You can underline key words to make them pop.  Use color to make different parts of your message stand out.  Place a post-it note on the message as an example of your expectations for students.

Here is another example.  This morning message ties in our math content.  I am collecting data about students' favorite colors.  We will use the tally chart to make a bar graph during morning meeting.


Notice how I left the day and part of the year blank at the top of the message?  I do this so I can reuse the message next year.  I'll just cut off the bottom and put a new piece of paper underneath it.  You can use post-it notes to add the date to the top of your message or have students help you fill in the date during your morning meeting.

Here are some helpful tips to make your interactive morning messages amazing:


Do you use morning messages in your classroom?  What tips would you share?