Pages

Tuesday, July 14, 2015

5 Things to Do to Get Ready for Back to School


While we are still in the middle of July and summer vacation is still in full swing, the beginning of the school is definitely in the horizon from here!  As much as I want to extend my summer vacation a little bit longer, I know that any time that I put in to prep my class for the back-to-school rush now, I will definitely be thankful later. Here are ways I prepare my classroom before the beginning of the year.

 1. Decorate Your Classroom
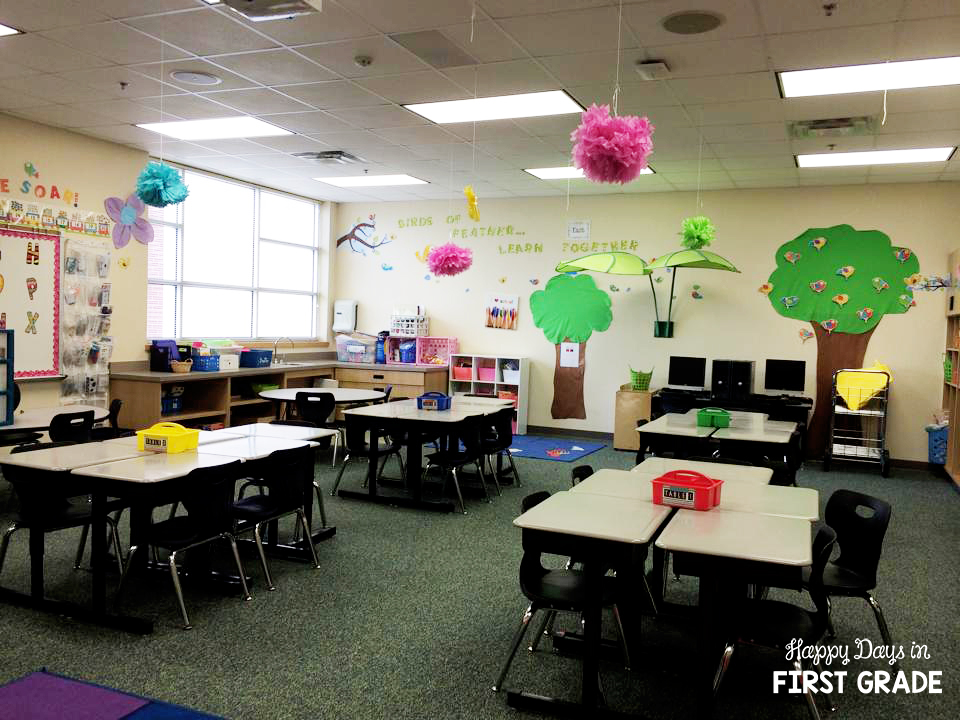
 May you move to a new classroom, just want to revamp your classroom's theme, or want to rearrange your word wall or student desks, do it now when you have time the energy and time. New decorations and borders are always coming out in the summer! While it's definitely hard on the wallet, and I try not to make it too over-stimulating to accommodate to my students' needs, I must admit that I am a fool for all things cutesy that make my classroom inviting and engaging for my students. Try also to follow teacher supplies stores online as they often have giveaways and promotions going on in the summer.


 2. Get all the First-Week-of-School Essentials Ready
Name plates, dismissal tags, name tags, supplies organizers, communication folders, behavior calendar, sharpened pencils, and the list goes on...Whatever it is that you need that first week of school, go ahead and purchase them now. I usually get my roster the day of Meet-the-Teacher, however, I try to have all the materials on my desk ready to go when it's time. It saves me a lot of time and helps keep things organized.


 3. Create a Plan on How To Organize School Supplies
My students begin bringing in items on Meet-the-Teacher Night. There are certain things that I like for my students to keep in their cubbies for personal use (scissors, pencil box, crayons, folders, notebooks, and markers), and there are other things that are for community use (construction paper, erasers, dry-erase markers, tissue boxes, glue bottles, glue sticks, etc.).

For items that are shared throughout the year, I leave bins out in the hallways with labels and instructions for parents and students to simply drop them off. As more things are collected, I then place enough shared supplies (glue bottles, scissors, and pencils) in little bins in the middle of student desks while others like tissue boxes, construction paper, and dry-erase markers are placed on shelves or in cabinets.  Also, the first day of school is also a great time for students to work in small groups to separate construction paper by color. This activity allows students work together and take ownership of their own classroom.   In addition, whenever you need a stack of a certain color construction paper, it is already separated and ready to use! :)

Below are the labels that I use for organization.


4. Reorganize Your Teacher Desk
I try every year to reorganize the supplies inside my teacher desk simply because I know once school begins, it is the last thing on my mind. And what's more frustrating than trying to find more staples or paper clips when it's the first week of school and you have about a million notes and forms to collect?! Buy cheap desk organizers to help compartmentalize different areas in your drawers for all your office supplies essentials. This has helped me keep organized, and a great way for me to know exactly where my things are when I need them.


 5. Decide On Your Student Seating Arrangements
Some teachers on my team have decided to do away with individual desks and go with circle tables. I've decided to keep my student desks as I prefer my students having their own storage space and to eliminate time from getting supplies when needed. Once I have my student desks arranged, I make sure I place labels on their supply bins to show what group they are in (Group 1, 2, 3, & 4). This really helps when I call to pass out papers or line up. No matter what you decide, this is the time to decide if you want five students to a group, the use or desks or tables, or where all your different learning areas will be (Writing Center, Library, Word Work, etc.).


These are just five things that have really helped me get organized for the beginning of the year. What are some things that you do to get your classroom going?


Monday, July 13, 2015

FREE Activities to Work on Learning Names

Learning how to write your name is such a big deal when you're little. Many of us still have Kindergarten students coming to school that still don't know how to write their name or write it correctly. It drives me nuts when students come to me writing their name in all capital letters. Who teaches them how to write that like?? I know uppercase letters are easier to form, but that's not how to correctly write a name. I've even had students argue with me and tell me that's not their name when I show them what it should look like. Here are some activities I use to work on recognizing our names, writing our names, and learning our friend's names too. 

To incorporate fine motor skills and name practice, I use toothpicks. Each student gets a paper with their name on it. They then take a toothpick and poke holes through their name. This could be used for sight words, letters, numbers, etc. throughout the whole school year because the students have so much fun with it. 
Once they are done with their name, they can hold it up to the light and it kind of making it looks like their name is shining like stars.  
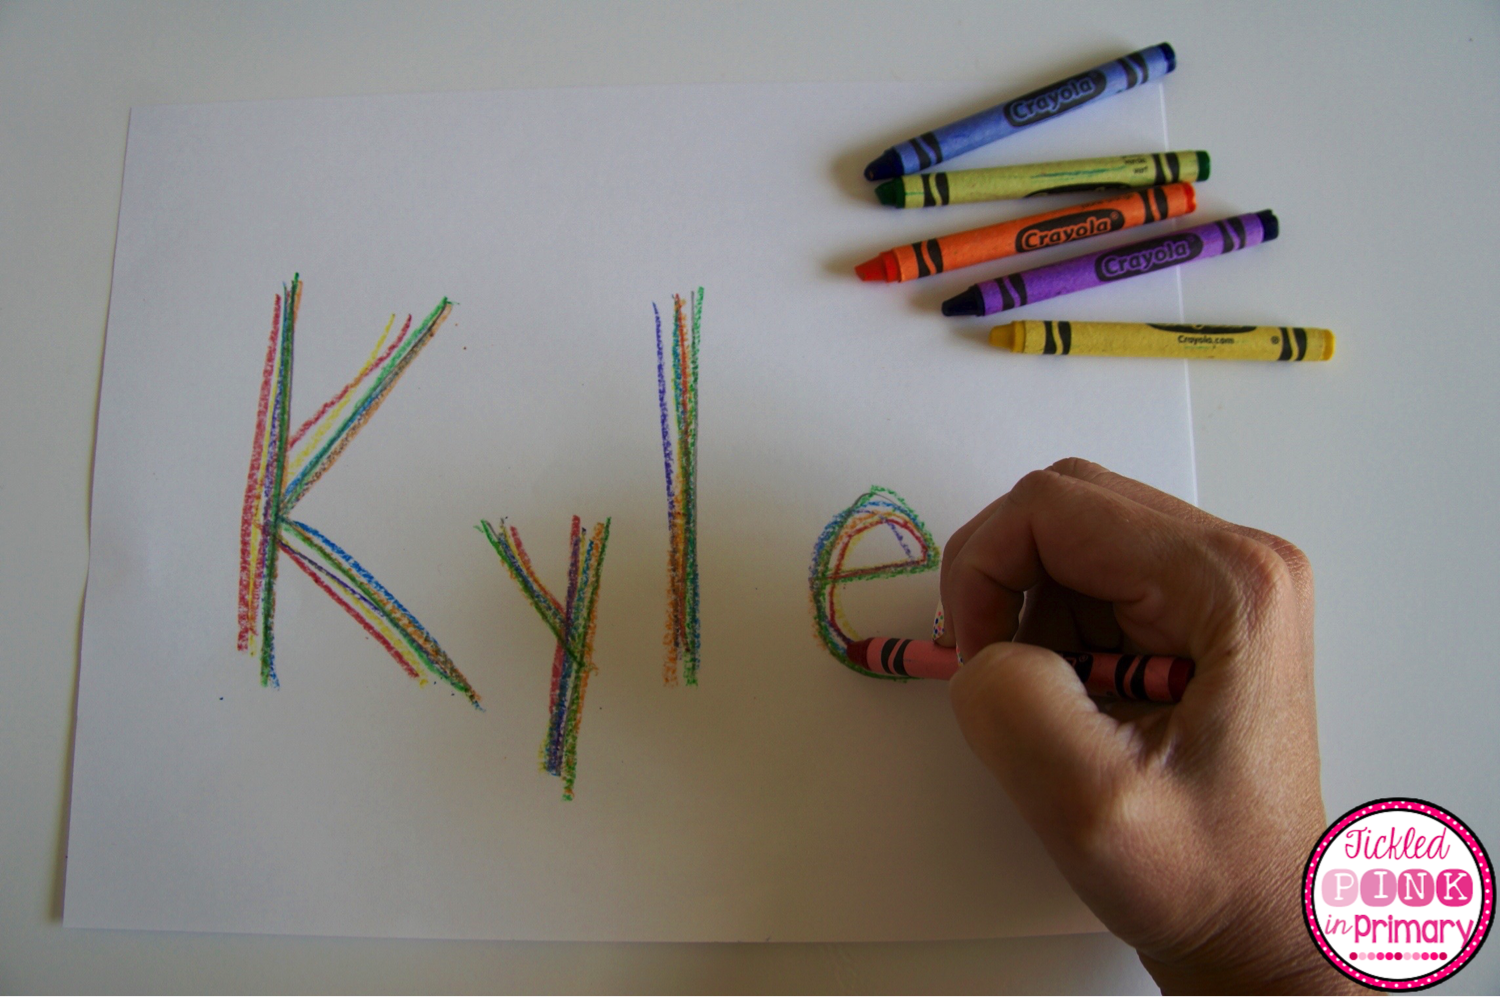
Rainbow writing is such a easy way to practice names. I write their name on a piece of paper and they take turns using different colors of crayons to trace their name. Super simple, yet fun!
I teach students "The Plate Song," to learn their name, but also start to recognize their friend's names. We form a circle on the rug, then sing "The Plate Song" and I throw 2-3 plates on the ground. If a student recognizes his/her name, they get to pick up the plate. So simple, but they love it! The song is very catchy too, so after 2 times of singing by myself, most of the kids have already learned it. 

The Plate Song
tune: If You're Happy And You Know It

If your name is on a plate pick it up, (clap clap)
if your name is on a plate pick it up, (clap clap)
if your name is on a plate, then you're doing really great,
if your name is on a plate pick it up!
Lastly, I incorporate sorting into our name unit. This way I can work on names during reading, writing, and math! I created this FREEBIE for you to use your first few weeks of school. It has many activities included to help students recognize their name, as well as their peer's names. Students can work on counting letters, clapping syllables, and sorting! I write student names on flashcards and use pictures of each student for different sorting activities. At the beginning of the year, you may just have students play memory with their friend's pictures, but later in the school year, they could match the picture to a name. These activities could easily be put in a center tub or pocket chart. 
Click here to grab these activities for FREE!


Friday, July 10, 2015

All About Me Paper Bag Booklets: A DIY Tutorial and Freebie

Hi there! I'm Shelly Rees from Appletastic: Blossoming in Fifth Grade. Looking for a creative way to better know who your students are, but you don't want something that takes a ton of prep work and materials?  Then try making these sweet All About Me Paper Bag Booklets!


For each student, you will need:

  • 3 brown paper lunch bags
  • 3 pieces of ribbon (each piece about 3 inches long)
  • 6 squares colored construction or cardstock paper (about 4 1/2 inches x 4 1/2 inches)
  • glue stick
  • scissors
  • hole punch
  • copies of All About Me template (Get the FREE download HERE.)

First, place the 3 paper bags in alternating directions. The bottom flaps should be face up. Then fold each bag in half, keeping them in alternating directions.

Next, place the bags on top of each other, keeping them in alternating order. Fold in half and punch 3 holes (you can use 5 if you prefer) along the folded edge.

 Thread ribbon pieces through the punched holes and tie with a double knot.

Then, cut out the 6 template pieces for the booklet. The free download has black and white pieces for the inside pages. It also has colored pieces for the cover, if you want to print in color. The download is editable, so you can type in your students' names in your favorite font. You can also have them write their own name in marker, if you want to go that route.

 After all the pieces are cut out, adhere them to the colored cardstock paper, and then glue them to the pages. (You can glue down the flaps from the bottoms of the bags before placing the cardstock square over it.) Each inside double page spread will have one page with a labeled cardstock piece and one blank paper bag page.


When the book is all assembled, have students draw, color, add embellishments, make lists, add pictures, create collages, and make the project their own individual expression of who they are. The pages with open ends of the bags can be used to hold extra items, such as photos and memorabilia. If students do this, they may want to secure those pages closed with paper clips or brads when the booklet is not in use.


After all booklets are finished, have students take turn sharing their creations with the rest of the class!

If you're looking for some more wonderful freebies, check out the FREE section of my TpT Store!
Here is one to get you started:

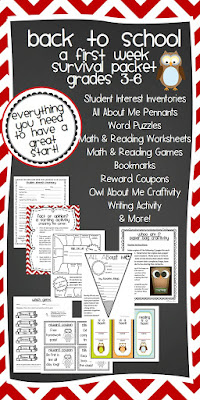
You might also like my Back to School First Week Survival Packet!  Print and go!

Happy Teaching!
Shelly Rees


Tuesday, July 7, 2015

Coin Cones!

It's all about the money, money, money!
We sang that a lot learning about money this year.
Hammering home coin identification is a tough one.
With money it seems like kids either get it or they don't.
Fingers crossed more get it, than don't!
I wonder if because we use debit cards so much more now 
and kids have less exposure to money at home. 
Just my two cents- no pun intended.
Driving to school,which is my favorite thinking spot,
one morning this spring, 
I was thinking about ice cream!
I was also thinking about how my kiddos
needed a Fun Friday craft activity
as well as some additional money practice.
Then this deliciousness was born!
The set up is easy peasy.
Copy scoop template onto a variety of colored paper.
You need 4 scoops per student.
Copy cone template onto brown.
Copy table of coins onto regular printer paper.
********
Then away the kids go!
Here are the directions I gave.
1. Color all the coins the correct color 
on the sprinkles sheet. 
Sidebar- we call them jimmies here in Massachusetts.
2. Color the rest of the boxes multicolor to resemble sprinkles.
3. Cut out 4 colorful scoops.
4. Cut out 1 cone.
5. Glue scoops on cone.
5. Cut out sprinkles sheet.
6. Glue matching sprinkles onto each scoop.
On the first scoop they had to put the word "penny", 
the pictures of the penny coins, 
the word "one cent" and the symbol for "1 cent".
Then repeat for the nickel, dime and quarter 
down the scoops on the cone. 
I then had them check with me 
before they glued any sprinkles down 
to see that they had everything where it was supposed to be.
 I love when an assessment can be fun and 
makes a cute decoration too!
Such a job perk!

Grab your templates to do this project with your class {here}!
Be sure to visit me at A Burst of First
for more tips, tricks and ideas!


Monday, July 6, 2015

Back to School Read Alouds

Hello and Happy Summer Vacation! It's Allison from Stuckey in Second. I always love coming over here to post on Who's Who and it's been awhile! I thought that I would share some Back to School Read Alouds today. Last year, over the summer, I asked my readers for some suggestions and I was amazed with how many books I hadn't heard of. How can I have a classroom FULL of books (and I mean, FULL!) and also be so "out of the loop" on current books? It just goes to show how many books are out there and that we need each other to collaborate and share our finds with each other! I can't say that I didn't know about ALL of these, but I had kind of "forgotten" about them. 


First Day Jitters is just hilarious. The kids love it and it breaks the ice with them about being nervous for the first day. Spoiler Alert---it's the TEACHER that has the first day jitters, even though you assume through the entire story that it's a kid that has the first day jitters. A good book to make connections with your new students on the first day! Plus, it will make them laugh!

Just like the title says, this book is great for teaching kids how to treat others! I think everyone needs that reminder at the beginning of the school year! (And maybe again later!)


A great story for reminding kids how to act...OR ELSE..... Also for letting them know how they should act if they ever have a substitute teacher. You never know when an unplanned day could pop up. This past year I had to take a day off the first week of school! Talk about stressful! 


I have read Chrysanthemum at the beginning of the year for quite a few years. I like reading it because it reminds the kids again how to treat others and how we are all different and unique in our own way. Plus, I just love Kevin Henkes! 

Sadly, this past year was the first year that I read about filling each other buckets. Why didn't I do this sooner? We made a great anchor chart after reading the story and talked about how we could fill buckets in our room everyday. That chart was a reminder all year to ourselves, "Are you filling someone's bucket today? How CAN I fill someone's bucket?"

Love Enemy Pie. It's a cute story and AGAIN, shows kids how to treat others! (Even an "enemy"!)


The Recess Queen is a good story to show kids how to treat each other on the playground and how to make friends with people, even if they are being mean to other people. It teaches kids how to be the bigger person and maybe even be FRIENDS with the "mean" kid. Maybe you will find out they aren't actually mean....


Tattle Tongue is definitely one of my favorites and it's one that I just discovered this past year. It teaches kids about appropriate and inappropriate tattling, when you should and SHOULDN'T tattle. I found myself referencing this book all year long! I was even asking my own kids at home, do you have a "Tattle Tongue"? Then I remembered that I really needed to bring that book home and read it to them!   


Thursday, July 2, 2015

Personal Slates

Friends~So I have a HUGE and I mean HUGE collection of folders from past years.  I have been trying to figure out just what to do with them. I love saving money and paper in my classroom.  This is what I came up with.
Directions
1.Take one folder with prongs. 
2. Add one plastic sheet protector.  
3. Slide in a sheet of copy paper.
4. Add dry erase markers and that's it!
(I hot glued pom poms to the sides as erasers.  I never wanted to hot glue to the tops because then my students couldn't put the tops on the markers when they were working.  The sides work perfectly!)
 These babies have transformed my classroom.  My kiddos used tons of notebook paper and composition books in the past.  I was constantly drowning in PAPER!
With these slates, my students are able to respond to our classroom lessons easily and without excess paper.  
Plus: My students are crazy about them!
I have students that I have struggled to get to participate writing on their slates to answer questions during our lessons. WHAT?????????
They are portable so my kiddos take them everywhere! 


~They are so much easier than using a white board. They fit anywhere a folder does,  I can add things to the pockets to individualize them, and they work for any subject.  
~When I set up center work that requires a sheet for them to work on, I just copy it on card stock and the students slide it into their slate pouches!

 photo signature-39.png

Button


Wednesday, July 1, 2015

What Do I Do With Just ONE iPad in My Classroom?

Hi everyone! It's  Lisa from over at Second Grade Stories. Do you have access to iPads in your classroom?  Are you a 1:1 school? I would really LOVE to have a class set of iPads - even just to borrow once a week.   I originally wrote this post on my own blog when I only had ONE ipad.  I was determined to find more uses for it that just as a center during Daily 5 or math time.  I am a big believer in using technology as much as possible in the classroom, so if I only had one iPad, then that one was going to be used ALL. THE. TIME. Right now, I have 3 iPads in my room.  There are also a few others that other teachers in my building have that I can borrow... but for the most part, we just use those three. 
 
I have found MANY ways to use iPads in the classroom - even if you just have one... or two...Here's a little peek at how you can integrate a small number (even just one!) of tablets into your daily classroom adventures - and make it meaningful.

Morning Mission
Each day I have a new "helper of the day."  I stopped using a job chart long ago and now just rotate through my class list to have each student be my helper each day.  One of the perks of being the helper is being able to do a "mission" on the ipad before we start morning meeting.  I make these missions quick and easy, and they're usually (but not always!) related to something we're doing in class.  I have a small whiteboard I use to write down the task and I make sure the app or website needed is easily accessible.  When my "helper" comes into the room and finishes getting things ready for the day, she or he checks the "Morning Mission" card to see what to do. 
 
At one point, we had been focusing on nonfiction texts during our reading time. Insects were a big hit with my kiddos, so I asked the helper to choose a partner and listen to/read this National Geographic issue about bugs and be ready to share one interesting fact with the class during morning meeting.  National Geographic Young Explorer has a TON of great issues online.  Be sure to check them out.  I kept this same "Mission" for a week so quite a few students had a chance to read the informational piece. If you have more than one tablet, you can set up these missions to take the place of morning work.  Students can join a group as they are ready and write their own fact (or question!)


It is also the helper's job to to find the temperature using The Weather Channel website.  We record this each day as part of our morning meeting time.  The helper also gives the forecast and the expected high for the day.  It's a little thing, but it gives students another piece of ownership in the classroom.

Reading and Math Centers
This is the time most people use their tablets during the day. There are a TON of great websites and apps available for online books, spelling and math.   I have a centers rotation during my reading block, so the first half hour is a whole group time, and the next hour is small groups.  When students are not working in a small group, they are doing one of the rotations.  The ipad can be part of listening to reading, read to self, words or writing. Here are a few reading sites and apps we like: 


I like to use the Tumblebooks website, which has a great selection of books perfectly formatted for the ipad.  Tumblebooks is actually a paid site, but many public libraries have the link on their webpages for free.  If you google "tumblebooks and library" you can find the links.  The Tumblebooks library is filled with popular children's books, as well as some less familiar stories.  Books can be read on an "automatic" setting, where the pages turn on their own, or on a "manual" setting so students can read and enjoy at their own pace.

 
Here are few other online story sites that we use:
          
http://www.storylineonline.net/                         http://www.wegivebooks.org/
 

Storybook Maker is a paid app, but I found it to be well worth the price. My kids love using it to create their own stories - and recently we've had "continuous" stories happening. One group of two or three starts a story one day, then other groups add to it throughout the week.  They love reading the completed story!
                                                                 

Rocket Speller is a fun way to practice spelling.  You can choose from a variety of levels and spelling skills.  Students are given a picture and must use the letters to spell the word.  There are helpful hints and as the levels increase, the words get harder and have less help.


ABC Magnetic Alphabet Lite is a simple way for students to practice spelling words.  It's just like those fun magnetic letters for the fridge, only there's nothing to clean up when you're done!  I have students work in pairs with a variety of spelling lists (on index cards), depending on student needs.  One student takes a card and reads it to the other to spell with the letters on the ipad.  The other student checks the word and they switch roles.  Easy peasy - but they love it!

Math: Ok, moving on to math.... I run my math block very much like my reading block - half hour of whole class, then an hour of groups, with students working on "Math Daily 5" rotations if they are not in a group.  One rotation is Math Technology, which is using the Smartboard or the ipad.    At the beginning of the year, we work hard on applying our addition strategies, so these apps help students practice their addition facts. I have another post {HERE} about other great math apps - some that are dual and multi-player.

This is a paid app now.... I think I got it for half price a while ago, but it is worth it.  In Top It, students deal cards and add them together to find the sum - the one with highest sum wins the round.  The app gives you clear directions for the first few rounds, then students play on their own.  I believe there is also a Top It for subtraction.  This is part of the Everyday Mathematics series by McGraw Hill, so if you're familiar with that you'll know more of the games from this publisher.


Math BINGO is also a paid app (.99, I think)... this is my students favorite math app right now.  There are different levels of addition and subtraction, multiplication and division.  Students are given an equation to solve and when they find the answer, they click on the correct number on the BINGO board.  Little bugs come up and when they get BINGO they win.  Fun!


End of the Day
Whew!  That one ipad gets A LOT of use... and it's not quite done yet!  I also have students working on the ipad at then end of the day when they are waiting for buses to be called.  This time the apps are more "fun" - logic games, strategy games, visual motor... etc.  Right now we're using "Pick Up Sticks" as a great way to improve eye-hand coordination.  This fun little app allows you to choose what the sticks look like - the vegetables and the Christmas decorations are the first choices for us!


Small Group Projects
Many projects and activities originally geared for 1:1 classrooms can ften be easily adapted to wor with small groups.  Instead of each student having a finished project,, each group has a completed artifact to share. In addition, make those small groups work for you! We were practicing when and when not to use apostrophes (possessives vs plurals). I had all my kiddos rotate through a center where their job was to take a picture of either another person in their group pointing to something they owned (glasses, smile, pencil, etc.) or a group of items (crayons, markers, backpacks, etc.)  After everyone had taken one picture, I showed some of the photos to the whole class - their job was to write a sentence, using either the plural or possessive (and the apostrophe, if needed!). We did about 6 or 7 together, then I left the ipad as an early finisher and reading center activity for my kiddos to do on their own.  They loved it and they really loved using their own photo to show me what they knew!

Take advantage of the enthusiasm our students will have for creating videos! You can use one of those more in-depth apps, or just rely on the camera from the tablet.  My students had a great time showing off their completed biography projects (complete with wax museum!) by making videos of themselves.  Students worked in groups and created a video of each person dressed as their famous person giving a short 2 minute speech.  We then worked as a class to create a Powerpoint slideshow timeline - fully interactive so you could click on the names of each person and the video would come up. We've also done videos explaining how to solve a math problem or sharing what we've learned about a topic.

My kiddos created a set of guidelines to help them take a good video.  We posted them in the room near where we do our "video creating."  They came out of trial and error - I had students create a first video by interviewing each other. Then we looked at the videos and noted positives and negatives about each one.  We used that information to create our guidelines.  You can download them by clicking on the image if you want them for your room.


As you can see, even if you only have one or a limited number of iPads or tablets available to you, there are still many ways to integrate that technology into the classroom. I have taken projects and activities meant as 1:1 and done them in small groups, where everyone rotated through the activity throughout the week.  I have also modified projects so that students worked as a team or small group, rather than individually.  The important thing is to make use of the technology you have - whatever it is!

I'd love to hear about other ways to use iPads/tablets in small groups or whole class.  How do you make it work in your room?