Pages

Saturday, March 8, 2014

How Much Are Your Students Engaged?

Hey everyone!  I'm Amy from Cahill's Creations!  As educators, we are constantly engaging our kids throughout the day.  We do this by creating amazing material to teach the standards.  We get kids talking about their learning and working collaboratively.  We use interactive notebooks and anchor charts.  We do what all great teachers do to engage student learning.

Even though I've been teaching for 10 years, I'm always looking for new ways to motivate and engage my little learners.  I realize that their attention span can only take so much at a time, so I need to make every minute matter!

This year more than ever, I discovered the power of YouTube in my class.  I can type whatever we're learning and a fun song pops up that engages my kids and gets them singing.  Here are some great examples of what we've been working on in my higher level reading group:


I created a Bossy e pack that my kids absolutely love using!  Find it here.


We do a song every day to start our lesson and the kids absolutely love it!  Then, we go into the lesson and the kids are actually helping each other use reading strategies by singing the songs.  Songs are so powerful in the early grades.  They're engaging and motivating.  Songs help kids remember, pay attention, and think!

"I remember from the song" is a very common response to my question, "How do you know?"  I love hearing that because it's another way to cement their learning.

Youtube doesn't end at reading time.  It is a big part of our learning day.  I use it for transition time or when we're playing a sorting game where the kids have to get into groups based on whatever objects they have.  Most recently, I played this song while kids moved around the room to find others who had the same 3D shapes.  They had to be sitting in their groups by the time the song ended.


My class knows when it's math time when they hear this song:  (It's very soothing, so I also love it!)

Here's one more we've been using as we were learning all about shapes.


Okay, so I am a little obsessed with using YouTube as a learning tool in my kindergarten classroom.  I see so many benefits throughout the day.  I sure hope you can access it too because it's amazing!  Just type in whatever skill your class is working on and I'm sure something amazing will pop up!  :)  Have fun and get your students engaged!  If you have any great resources that your kids absolutely love, please share!

I will not be using these engaging songs for awhile because we are officially on spring break!  WooooHooo!


Friday, March 7, 2014

Does the Leprechaun Visit Your Classroom?

Top of the Morning!  This is Sue Lynch@TpT and I don’t know about where you live, but in the suburbs of Chicago we have endured a LONG and CRAZY winter!  March has definitely come in like a LION and I am hoping the ‘lamb’ shows up soon!  

I love St. Patrick's Day and all it's festivities!  Every year, I gear up for a 'surprise' Leprechaun visit!  Starting on the first day of March, I start integrating activities throughout the curriculum which always gets the kids excited. I know that sometimes I go overboard, but it's all for the kids!  I just pulled out my 'stash' that was left over from last year.  It's not much and it looks like I will be heading to the Dollar Store this weekend!


How do I use these items and what items are a must for a successful “leprechaun visit?”  First of all, I love hats!  I use hats throughout the year as not only a learning tool, but also a management tool.  My kids can wear (earn) a hat for various reasons such as good behavior, a wonderful idea, awesome work, etc.  I have a hat for almost every month!  This month is my “Lucky Leprechaun” hat!  I also have a shamrock headband that I let students wear (mostly girls choose it).  Also pictured is confetti, glitter, gold coins, mini pots, mini leprechaun hats, blowers and anything else I can find!  These items are scattered and slightly hidden throughout the classroom (before the students arrive!) on St. Patrick’s Day. You can go all out or just make a 'little Leprechaun mess.'  My favorite is the ‘glitter’ shoe prints that I strategically place throughout the classroom.  You can see an example in the picture above.  To do this, make a template with construction paper or cardboard. Place the template flat on the floor (works best on low carpet, not tile) and shake glitter inside the template.  The glitter is easily vacuumed up (by me) at the end of the day.  It’s amazing how the students don’t step on the ‘magic shoes’ of the leprechaun.  I only put a few in the room and not in high traffic areas.  The kids are amazed by the 'mess the leprechaun made' and for each item they find and/or see, they discuss with their thoughts, ideas and even ask questions.  It’s a wonderful beginning of our day as they are engaged in sharing, writing, exploring and even answering questions that their peers have (which gets me out of trouble!)

But--before the actual 'leprechaun visit,' I have my students participate in one fun activity to add to the excitement! The day before the event. I give my students a styrofoam cup.  I tell them to color the cup because on St. Patrick's Day , I will fill their cup with coins for positive behavior.  I don't give them any clue that the cup is a trap or hopes for a leprechaun visit as I have my own idea for a surprise! Your students think they are decorating for an incentive, but in reality their cup is going to become part of the 'leprechaun visit!'  You are going to take the cups and turn them into mini leprechaun hats!  Here's what you need to do:

Materials Needed:  Styrofoam cups (one for each student) and permanent sharpie markers.  Crayola markers do work, they just tend to smear a bit. 


Directions:  Have the students decorate a cup.  Again, I tell them that the cup will be used as an incentive to earn 'gold coins' for good behavior, work, etc.  Make sure that the students do NOT puncture holes in the cups.  Don't forget to mark the cup with each child's name or initials.  I usually do this right on the top. 

After school, gather the cups.  Preheat the oven to 250 degrees.  Always TEST a few cups (not belonging to kids) to make sure that the oven is working it's magic.  I have found that ovens heat differently.  I know my home oven only needs to be set at 200 degrees in order for the cups to shrink properly.  Again, testing cups before your student cups is worth it!


Hints for shrinking the cups:  Once you have tested some cups and you feel the heat is appropriate, put about 6 cups on the tray.  Put the tray of cups in the oven, turn on the light and shut the oven door.  Do not open the door until the cups are ready!  Allowing air to get in may change the shape of the cups.  If the temperature is right, the cups will shrink quickly! This should only take 15-30 seconds when/if the oven's temperature is right!


You will be amazed by all the little leprechaun hats!  If you're lucky, you may even get a few sombreros!  :)  Each hat is unique and believe me your students will be amazed and just love them! Now, put each hat on your student's desks.  I always put a little confetti and a gold coin (or two) with the hats.  When the kids come in and see 'the mess that the leprechaun made' they won't believe their hats!  How did the leprechaun do it?  Magic!  This will start a day of fun.  I love hearing the excitement, the reasons, the explanations, etc.  The writing center is always busy on St. Patrick's Day!

Here is a March Freebie that you can use on St. Patrick's Day!  Included in the March Freebie are mini bookmarks you can leave from the leprechaun, 'Gold Coins' that you can use as incentives on St. Patrick's Day (handing out coins for good behavior, being respectful, etc.) and a few themed writing pages for your students to use to share about the fun day or write his/her own March story!


Wednesday, March 5, 2014

Organizing Math and Reading Centers

Hi, it's Jennifer again!  I've posted a few times about math and reading centers on my blog, Elementary School Garden.  Over the years, I have received a lot of questions about their organization so I thought I would share a little about them today.


How do you organize your centers?
I use center wheels for both reading and math.  Since I hate sorting through center cards each day I use a center rotation wheel for each subject.


A few years ago I started out with a huge wheel that contained 2 centers for each group each day.  Now I've toned things down a little bit and just have one center for each group each day.  I've had a 6 day rotation (back when I only had 4 Kindles and couldn't have more than 4 students at a station).  Now I have a 5 day rotation which is the easiest given the 5 day week.

The colorful bins below the wheels are for students to turn in any work.  I love them because I can quickly see if students have turned in their work by counting to see if there are 4-5 worksheets in each bin (based on the number of students in that color group.)

How do you group students?
I group students heterogeneously.  The center work I use allows for differentiation regardless of student groupings.  I find it best to have a true mix of students within a group so that they can work together and help one another.  I also take into account who works the best together in each group.  I pull students for guided reading and math needs groups based on daily need regardless of what center group they are in.

How much time do you spend on centers?
We normally spend about 25-30 minutes separately on both reading and math centers.  In reading, we read independently and then begin centers after sharing as a group.  In math, students start their centers after they complete their exit ticket.  I use the center time to pull guided reading groups, conference with students, work with needs group and individuals.

How do you integrate technology into your centers?
We use Kindles, computers, and a Smart Board to integrate technology into our daily center rotation.  Students use the Kindles to play various free games and math fact apps.  On the computer they watch videos on Brainpop and Brainpop Jr, play math games on Hooda Math, and practice math facts on Xtra Math.  I use a variety of math games from Lakeshore Learning on the Smart Board.


How do you organize and store center materials?
I also have labeled bins spread around the classroom that contain center work and materials.  I like to spread them out so that when centers begin students are collecting their material in different locations and not bumping into each other.  It also helps keep our transition to center time quiet and organized.  I switch center materials every Friday.

How do you organize centers in your classroom?


Tuesday, March 4, 2014

How To Integrate Nursery Rhymes Into Your Classroom Lessons

Traditional nursery rhymes like Twinkle, Twinkle Little Star and Humpty Dumpty have been around for hundreds of years. These childhood rhymes have not only lasted the test of time, but they are forefront in the role of literacy in early childhood education.

"Nursery rhyme experiences and knowledge are considered important precursors and determinants of later literacy abilities." (Sadler-Oxford, 2000; Zuralski, 2005)

Being a music teacher and a trained classroom teacher, I'm forever using music as an educational tool. Nursery rhymes, in particular, are a really versatile tool that you can use to incorporate musical elements to everyday classroom lessons.

One of the most common ways I have seen teachers, including myself, use nursery rhymes everyday in their classroom is by taking these well known songs and changing their words to apply to learning concepts or classroom tasks. These type of songs, called piggyback songs, are easy to teach and easy to remember. Pinterest is brimming with piggyback songs of all varieties for every topic under the sun, from life cycles to math shortcuts to seasonal tunes. Here's a simple, yet effective little piggyback song I made to teach adding doubles that is a good example of how you can take a well known nursery rhyme and adapt it to teach a tricky concept for your students.

Adding Doubles by Tweet Music
In my classroom, I've been integrating nursery rhymes into my math and literacy lessons for as long as I can remember in ways such as this. I wanted to highlight how simple it is to take a well known song or tune, and turn it into an opportunity to extend and consolidate your math or literacy program.

As an another example, I've taken one of my very favorite nursery rhymes "1, 2, 3, 4, 5" and created some engaging activities for your students to work on basic math skills, such as counting.


http://www.teacherspayteachers.com/Product/Nursery-Rhyme-MATH-FREEBIE-1-2-3-4-5-Once-I-Caught-A-Fish-Alive-1144836

When I teach this rhyme in my classroom I always begin by first demonstrating the actions. I believe the actions are an integral part of the lesson because they not only help to lock the lyrics into the students memory, but they help students to learn or practice counting on their fingers for math activities.

My actions for this rhyme are as follows:

1, 2, 3, 4, 5: Pop each finger up one at a time as each number is sung until all five fingers are up.

Once I caught a fish alive: Push the open palm of your counting hand forwards to the beat, as you would if you were showing someone the sign for stop.

6, 7, 8, 9, 10: Pop each finger of the other hand up now as each number is sung until all 10 fingers are up.

Then I let it go again: Again, push the open palm of your counting hands forwards to the beat.

Why did I let it go?: Turn your palms of both hands upwards so that they are facing the ceiling (as if you were carrying a serving platter) and bob from side to side.

Because it bit my finger so: Wiggle your finger on your right hand.

Which finger did it bite? This little finger on my right: Repeat the last two actions to complete.


Included in the 1, 2, 3, 4, 5 Freebie are some math worksheets with a fish theme so that students can go from an action song about fish to an activity that uses fish for problem solving.


So I have shown you a few simple ways that I use nursery rhymes in my classroom, and hopefully inspired a few ideas that may suit your classroom. I've always felt that if you can take a concept and add a song it can help make the concept a little more memorable (and fun!).


                                                                   Happy singing,


Monday, March 3, 2014

Dr. Seuss Style Creature Collage

Another fun collage... especially for Kinders!


Hip hip hooray! 
This is the time
you'll read about 
cats wearing hats
 in a rhyme.

You'll add green dye 
to your eggs,
or you'll spray 
your hair blue,
or you'll just listen 
with joy 
to kids reading 
with you.

Perhaps, most of all,
{if you're lucky enough}
you'll discover that inside you
is some wonder stuff.

There's creativity goop
and a nonsense whim
and plenty of "silly"
that you don't 
find in Grimm.

So take all of your quirks
and mix them around.
Then take those 
creativity seeds
and plant them 
in the ground!


It's Read Across America week and that means we get to enjoy a healthy dose of Dr. Seuss around these parts. I am such a huge fan of his work that it is always a treat to celebrate as a whole school and in our individual classrooms. I've always opted to go all out in my classroom by theming my centers and writing and core studies to Dr. Seuss' amazing collection of books.

One of my favorite activities that I try to do every year is an open-ended art and writing project where students get to create, name, and write about a Seuss-style creature. As I'm not in the classroom this year I am kicking myself for not getting more pictures of the process, but it is really simple to prep and simple to explain. It is also an art project for kids that don't like art because it is more about the process than the skill level.

I won't lie. There is a tiny, minuscule, infinitesimal bit of prep work that you have to do in advance, BUT it is prep work that you can reuse if you do this project again.


1) PREPARATION:
Take your favorite Dr. Seuss books and look for illustrations that show different types of creatures... you want to collect a widely varied assortment of bodies, eyes, ears, tails, feet, etc. Photocopy the images you like while adjusting the lightness of your copy as needed to achieve an almost blackline appearance. Then cut out the different parts and make a randomized collage sheet of Dr. Seuss creature bits. Photocopy the creature sheet onto cardstock for each student.

2) COLLAGE:
Each student needs a collage paper, a blank piece of art paper, scissors, and glue. Students will cut out the creature parts they like and glue them together into unique Seuss-style creature of their own on the blank art paper. After the collage is dry, students will use crayons and watercolors to add color and depth to their picture

3) READ:
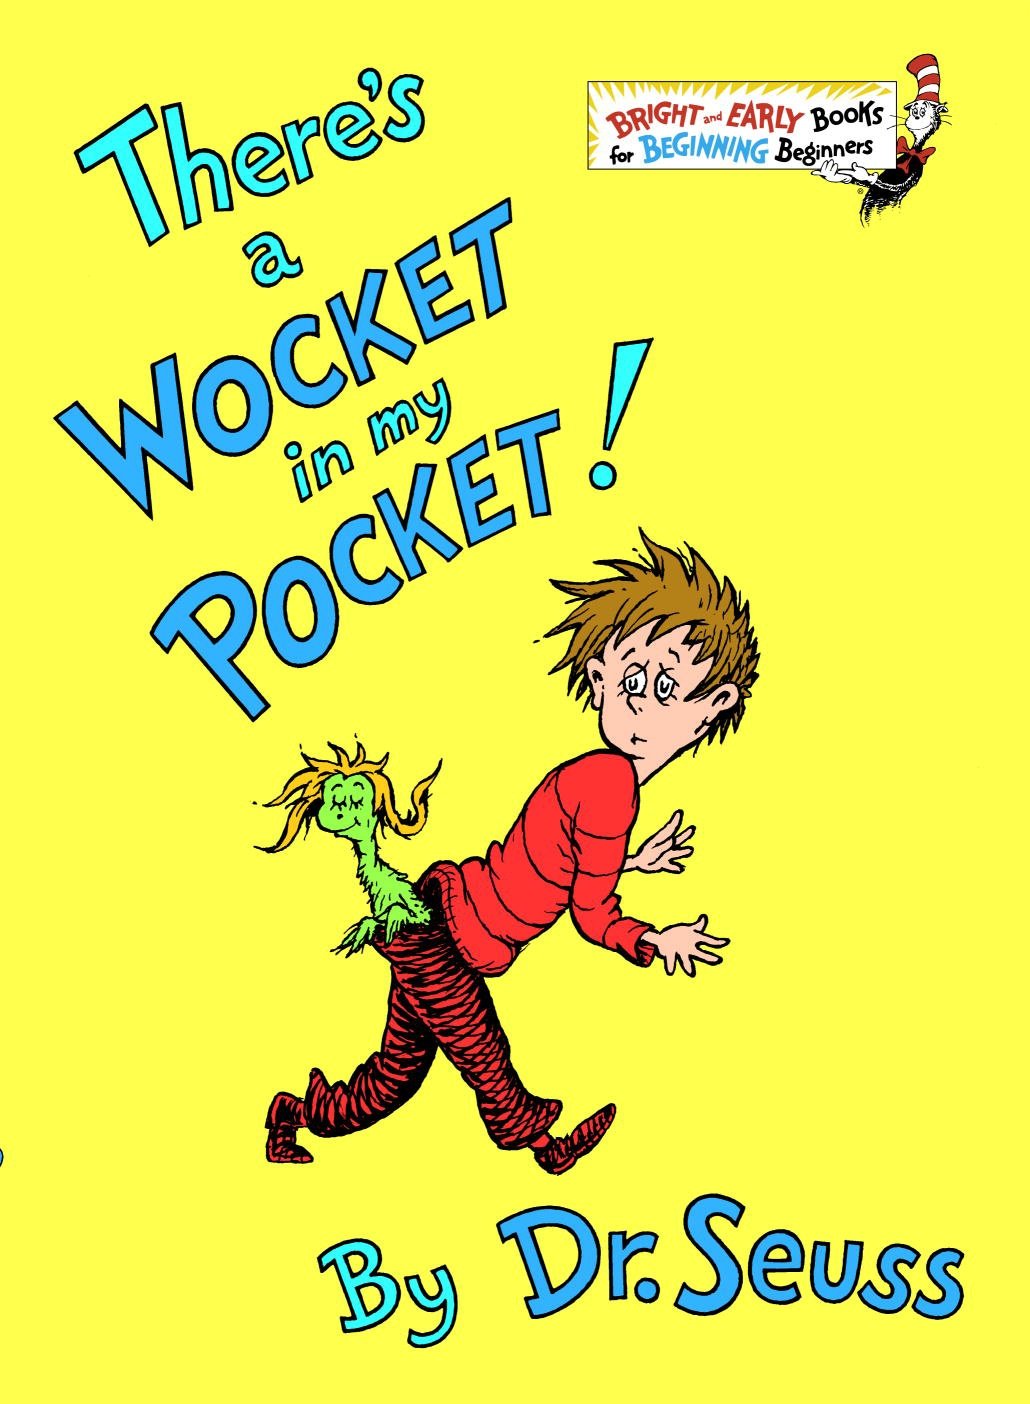
At this point, or sometimes before, I read "There's a Wocket in my Pocket" and discuss the different creatures and how they are named so that they rhyme with their environment.


4) WRITING:
Students will name their creature and the place it comes from in a rhyming pattern... stressing, of course, the possibility (or likelihood) of using nonsense words. You can end it there, but I like to encourage students to write a bit more. Students can write about their creatures personality, what it likes to eat, what it likes to do, etc. 


And, Voila! A beautiful Seuss-style creature.


Enjoy!


Sunday, March 2, 2014

Improving Reading Fluency with Audacity

Today is Dr. Seuss's birthday, so in honor of that, I want to share with you a reading activity I recently did with my class of 6th graders. They went from boring robot readers, to students filled with excitement and emotion as they read. Their fluency scores should soon be flying off the charts (If only it were that simple!). I have noticed that each year, my class is different (I know what you are thinking, "how profound"). What I mean by this is that some years my students LOVE to read. They do it alone, with partners, and chorally as a class; you name it, they read it. Other years, the students feel like reading is a chore, no matter what we read or do with reading.

We've tried reader's theater, book clubs, and reading novels as a whole class. Nothing was working. It happened to be the simple, short activity that got my students excited to read. We just called it "PowerPoint Poem Recordings". Yes, that's kind of a mouthful, so I'll take new name suggestions for this activity in the comments below ;).

Reading in front of the whole class whether alone or chorally can get some kids nervous, but when I gave my students microphones it all changed! Suddenly reading was fun. It was fun to speak into the microphone. It was entertaining to make different voices. It was cool to hear yourself recorded. Actually, my favorite part of all this was that they heard themselves read, and they practiced until they got it right. They wanted their project perfect.

 I started out using a free program you can download from the internet called {Audacity}. Next, I passed out poems written by Shel Silverstein and Kenn Nesbitt I had typed up on card stock. Any poem or story would work for this activity.
(A typed poem and microphone.)


                                           (The program Audacity opened up on the computer.)


Students also need a microphone and headphones. Depending on your technology, this could be done during reading centers, in the computer lab, or during a scheduled time on the computer as assigned by the teacher. There are 16 desktop computers in my classroom so we did this activity as a whole class, with students making recordings with a partner.

First students practiced reading their poems several times. They loved to make voices, read at different paces, and take turns reading with a partner. Somehow listening to themselves read was a lot more fun than just "plain old reading". Next, when they were done recording, students exported their audacity wave file as an MP3 and saved it in an easy to find location.

Then, students opened PowerPoint and designed slides with clipart and pictures to go along with the poem they recorded. Last, students imported their MP3 file of their poem into PowerPoint.While in PowerPoint, students clicked on the Insert tab. Then they clicked on Audio, which is in the top right hand side of the screen. The kids then chose an audio from file which happened to be their recording. Once the audio file was in the PowerPoint, clicking on the playback audio and then choosing the play across slideshow option allowed for their poem clip to play when they began their PowerPoint. I found this was best, because then as the slideshow played, students were able to click from one slide to the next as the poem progressed, and the right pictures appeared to match the audio.

My students enjoyed this so much we now have a reading center during reading rotations called PowerPoint Poem Recordings. What type of activities and rotations do your students do during reading in the upper elementary grades? I am always looking for new and creative ideas for my classroom as well!

Below is a sample PowerPoint Poem Recording done by me, because of student privacy, I did not want to share any of the children's work.


Saturday, March 1, 2014

Interactive Math Journals

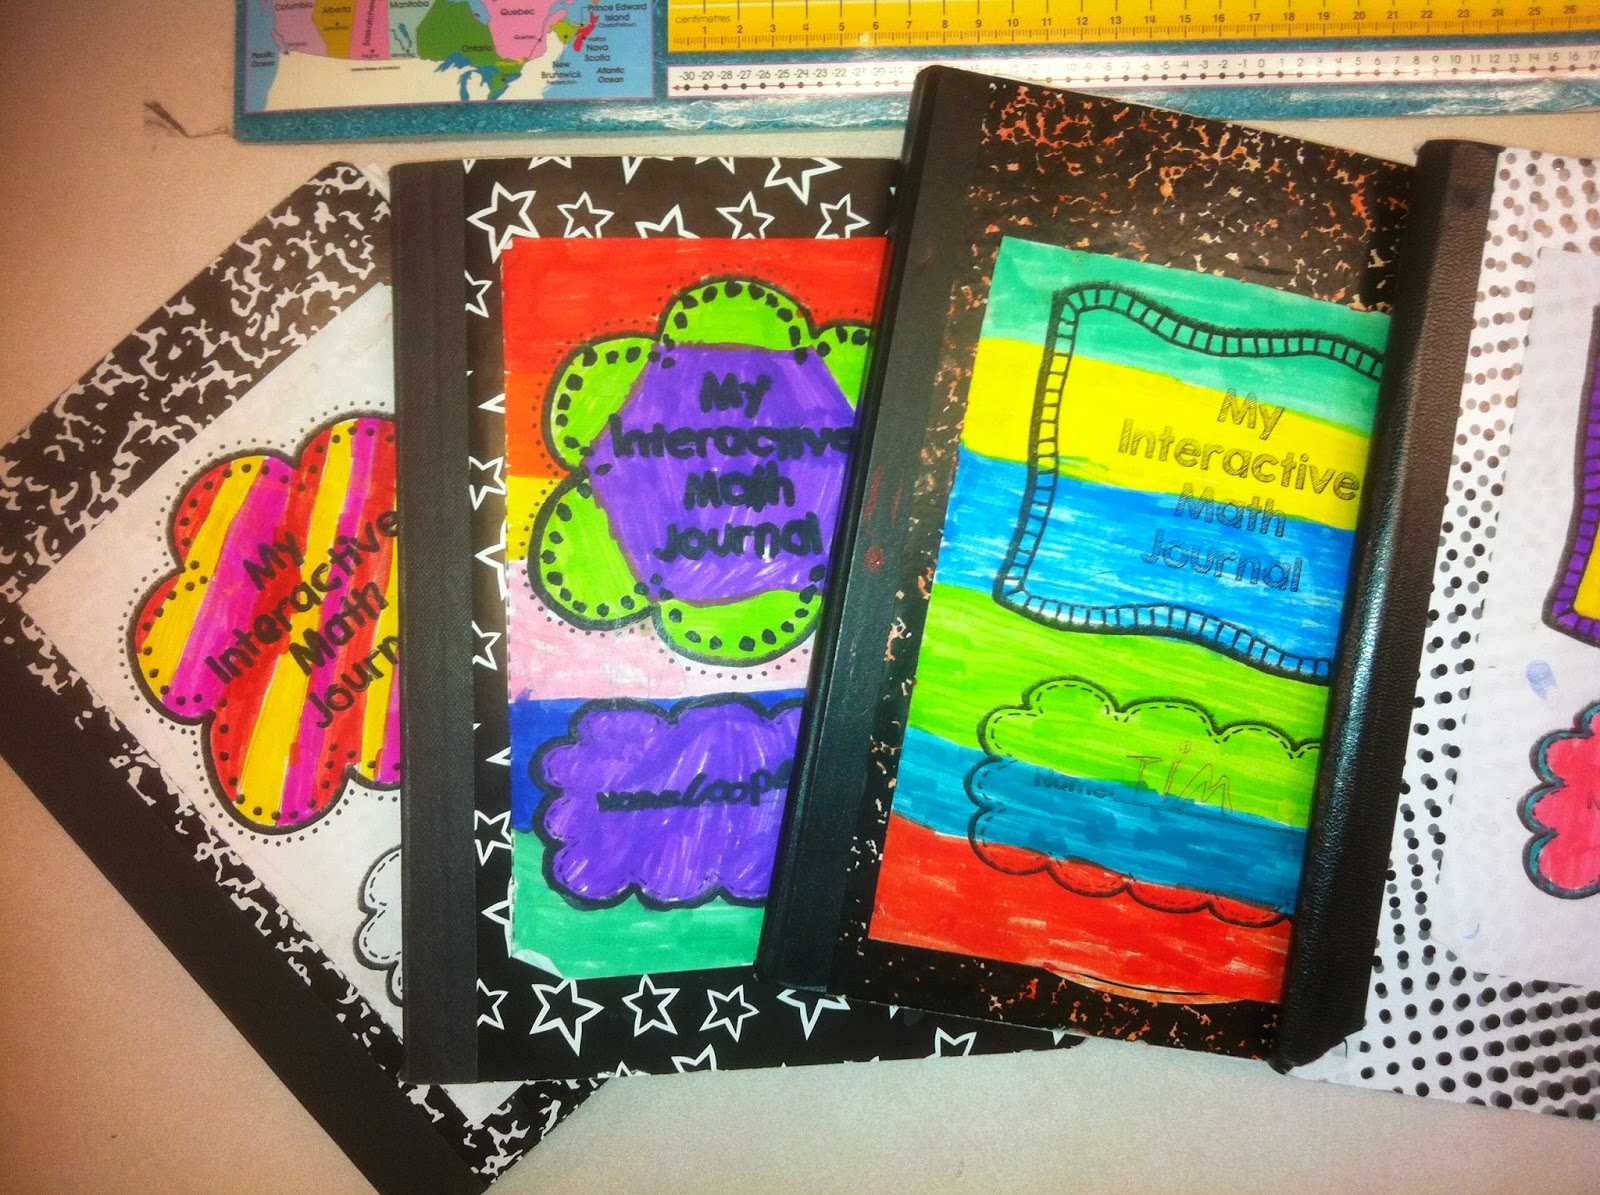
I can't believe it is March already!  I guess time flies by when you are having fun.  I don't know about you but every year I decide to try a few new things in my classroom.  This year I jumped on the interactive notebook/journal bandwagon in a big way!  I use those words interchangeably but I know some teachers may see them as two different things.  For me an interactive notebook/journal is a place for students to keep notes, practice skills and reflect on what they are learning in class.  I started slow at first with just using an interactive notebook for some of my social studies topics but then when I saw how much the students enjoyed working in their notebooks, I decided I had to use one for  math.  I thought in this post I would share with you some insights and offer you the tops tips that I have learned from incorporating math notebooks/journals into my classroom.  You may like to give them a try in your classroom.  

Tip #1   Buy composition books during the back to school sales at the dollar store.  I bought most of mine at the Dollar Tree while on holiday this past summer.  I stuck them in my suitcase and brought them back to Canada.  Needless to say my husband thought I was a bit crazy! 


Tip #2  Store them in baskets somewhere in your classroom.  I had them in my students' desks the first week and they used to get lost in-between their other supplies.  I only let my notebooks go home the week before a math assessment or if I feel a student will benefit from some extra work on a particular topic.  Students know to bring them back and I have always had them returned.  At our school we give out "Panther Paws" (Our mascot is a panther), which is a paper reward slip that can be entered in a draw for small prizes.  I sometimes reward students who bring back their notebooks with a "Panther Paw" for being so responsible with their school materials.  This little incentive has worked wonders so far.


Tip # 3  Make a pocket to attach to the front or back cover  that can be used to store the sheets or fold-its that do not get completed.  There will always be someone that needs a bit more time.  I used old envelopes that I had in my class and I sealed them, cut an opening in the top and attached them to the front cover.  


Tip #4  White bottle glue is better than a glue stick for attaching paper to the notebooks.  The glue from the glue sticks dries out and the paper then falls out of the notebooks.  Students will need to be shown how to glue.  You wouldn't think that is the case with fifth graders but take it from me they need a bit of instruction. I didn't realize how much glue students put on everything until I started math notebooks. The first few days there was glue going everywhere and I could not believe how many pages became stuck together. Yikes!!  I now love to hear my students using phrases such as, "No toaster strudelling" and "Use baby dots".   Here is a nice poster I found on Pinterest that helps to teach about using glue.


Tip # 5  Set up more than one page at a time.  One of the biggest time wasters I found in the beginning was waiting for students to get everything ready to start making the pages for their notebooks.  It would easily take my class ten minutes at the start of the period to get ready with the needed supplies.  Once everyone has their sheets, scissors, and glue out ready to go make a couple of pages that you will be using over the next couple of days.  For example, I set up all my multiplication pages during Monday's math class and then the rest of my math classes for the week would be spent on completing the different pages.  No glue or scissors needed only a pencil!


Interactive Math Journal for Operations

Tip #6 Make a model interactive journal to show students.  Some students may need a visual model of how the pages fit in the book or how a certain sheet needs to be folded.  Although it may be time consuming in the beginning it will save you so much time in the end because you will not need to repeat instructions over and over to your students.   I am a very visual learner and so are many of my students and the model makes notebooking easier. 

Interactive Math Journal for Place Value

Tip #7  Encourage students to help each other.  I always look for volunteers to help complete the notebooks for students who have been absent or are away on a holiday.  I wouldn't want students to come back and be overwhelmed with trying to cut, fold and glue all the missing pages.  Some students find the pages easier to complete than others and it has been refreshing to see them help their fellow classmates create a notebook that they too can be proud of!


I hope these tips help you if you decide to try using an interactive notebook or journal.  There are so many positive things that have come from introducing this tool into my classroom.  For instance, when I have math workshop and I am busy with a small group I will often see a student go and get their notebook to use as a reference tool instead of coming to find me.  When a parent emails to say they are not sure what we are doing in math I can send home the notebook with the student and it helps the parent to see how we are teaching a particular skill.  This is so important now as many topics such as multiplication are being taught very differently with strategies that parents may not have seen when they were going to school.  I have another student who works with a tutor and the tutor is able to use the notebook as a reference tool and review the skills in the same way as I have shown in class.  

I would love to hear about your experiences with using interactive notebooks/journals.